Graph Based Azure AD Integration
Here we also support graph based azure AD integration. we are going to explain few simple steps
Requirements
1. Visit https://learn.microsoft.com/en-us/graph/auth-v2-service?view=graph-rest-1.0#1-register-your-app
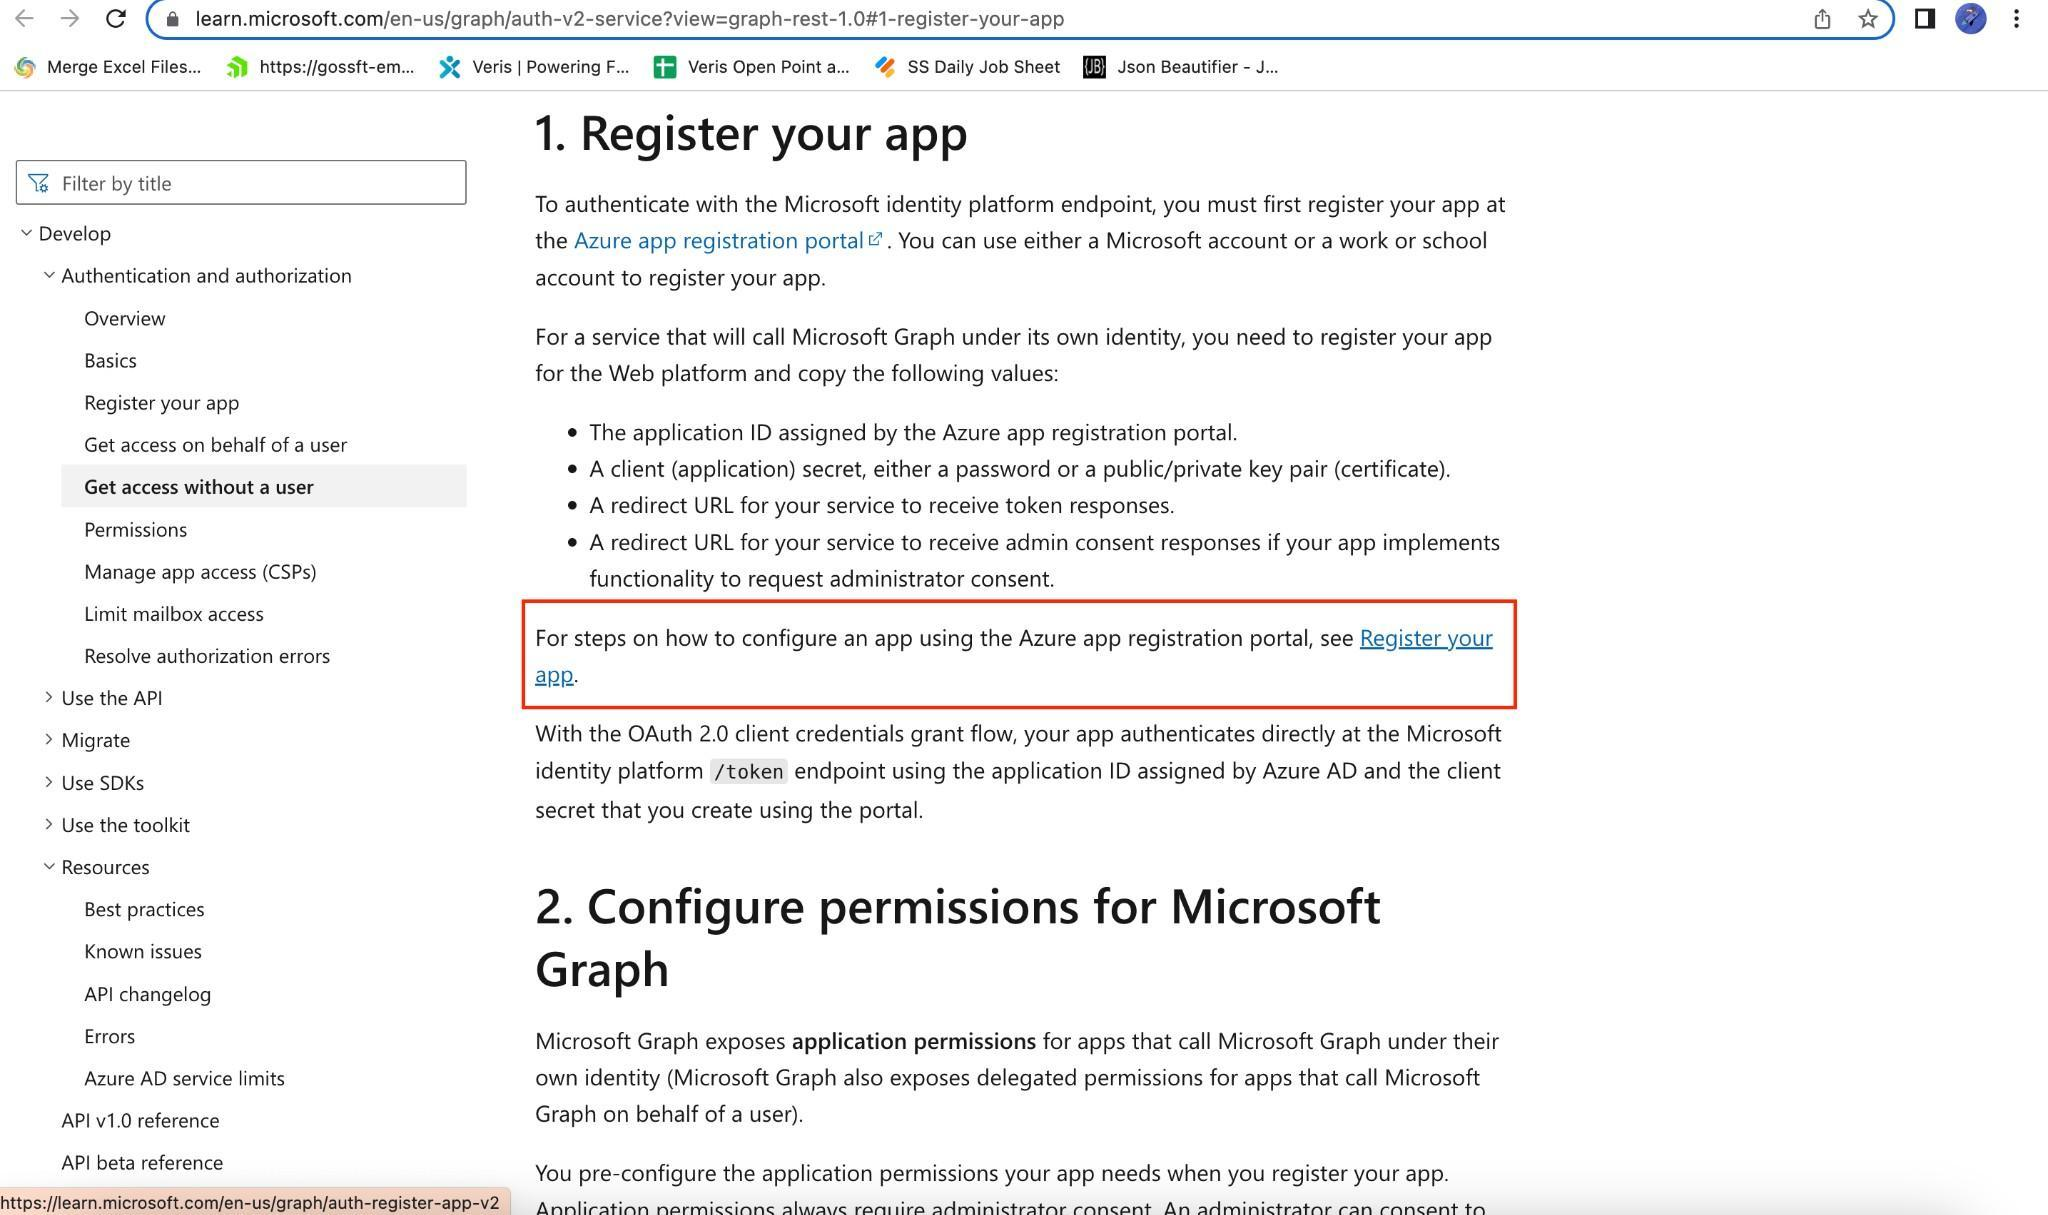
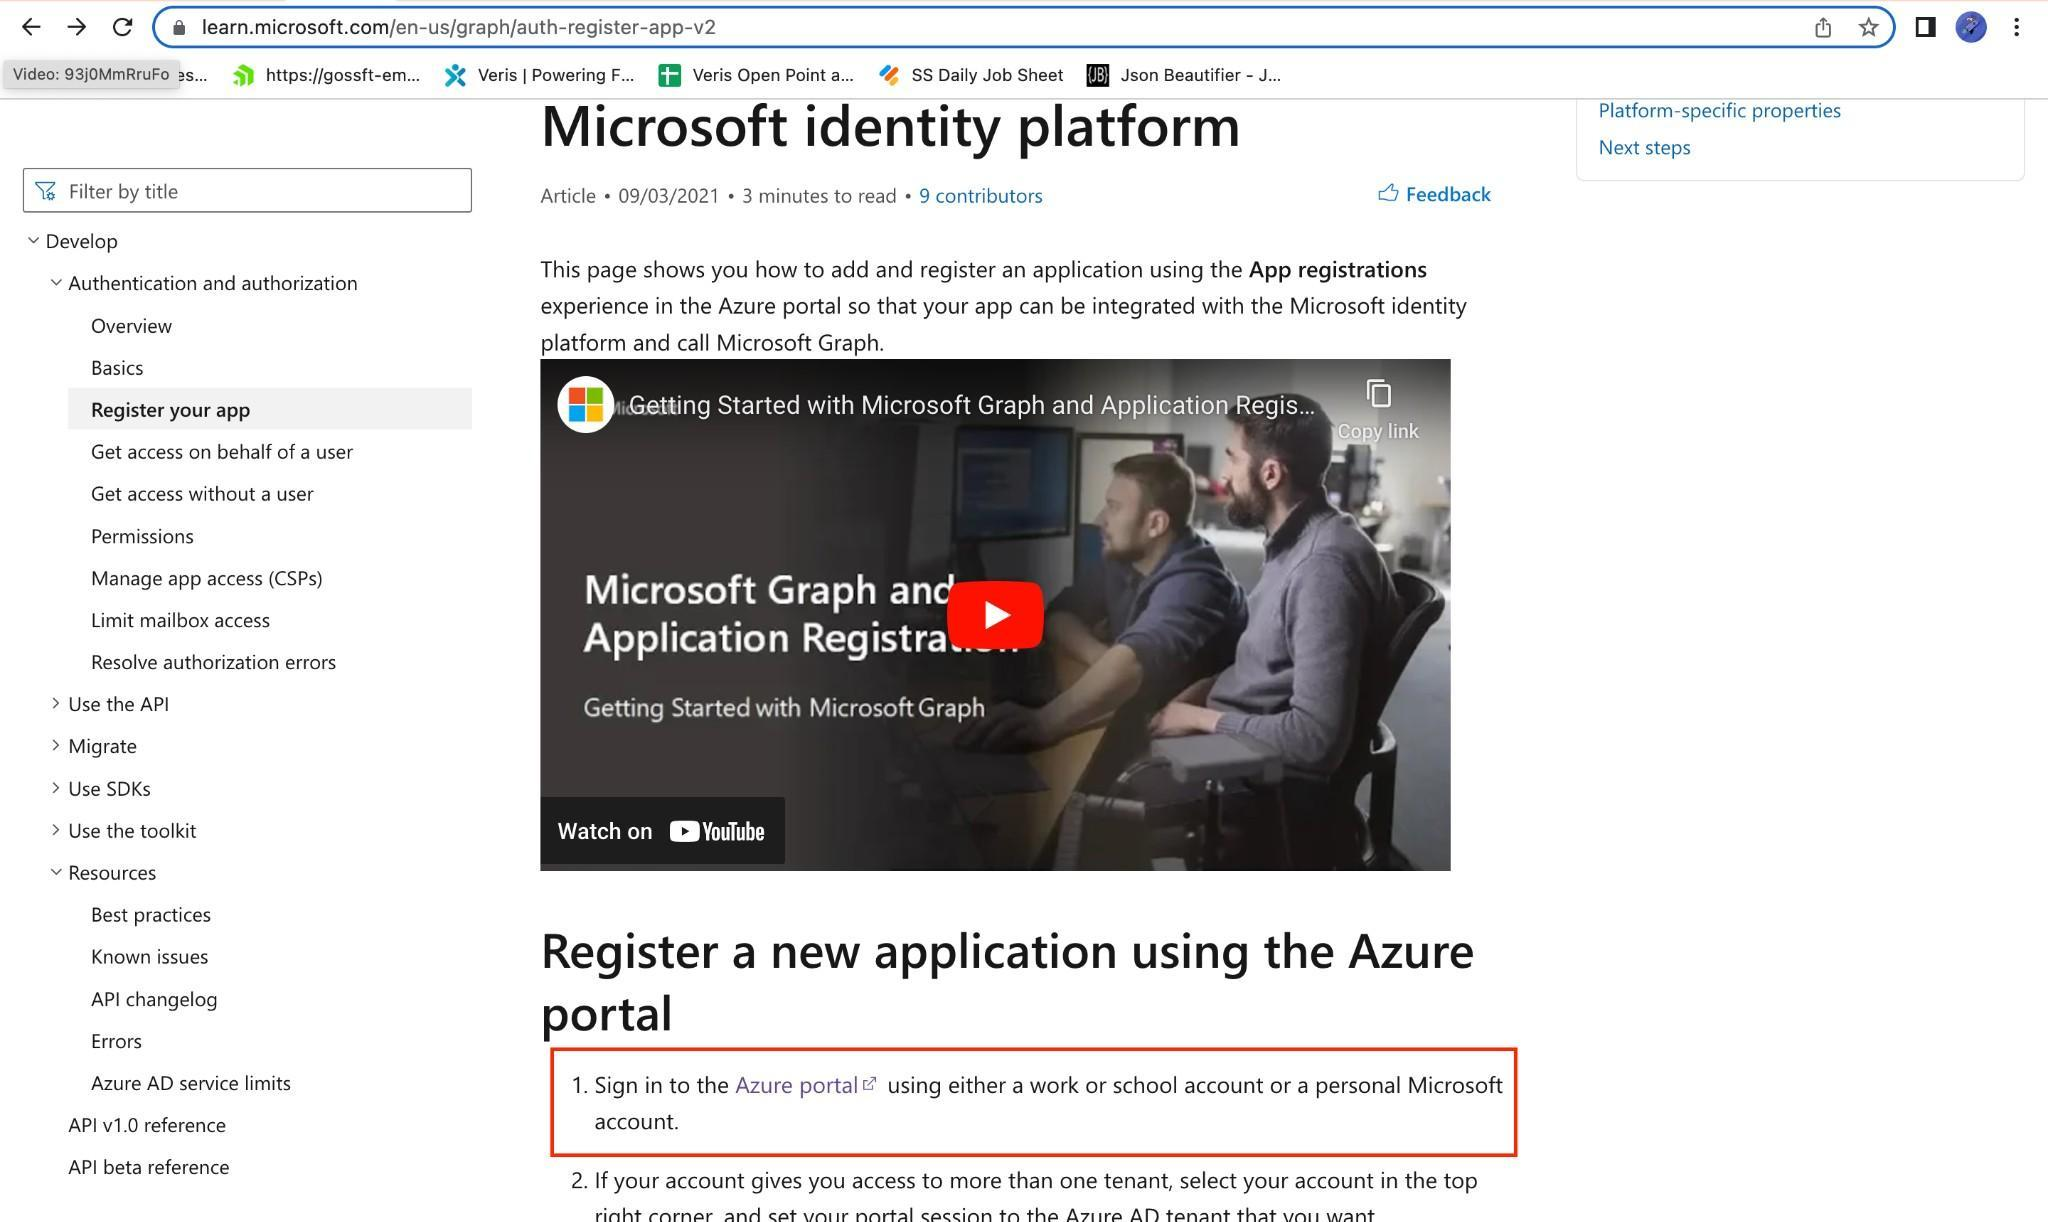
2. Click on Register your app as shown above or visit https://portal.azure.com/
3. Once you are logged in - you will see the following screen. Go to All resources and click on View

4. You will be taken to the following Screen
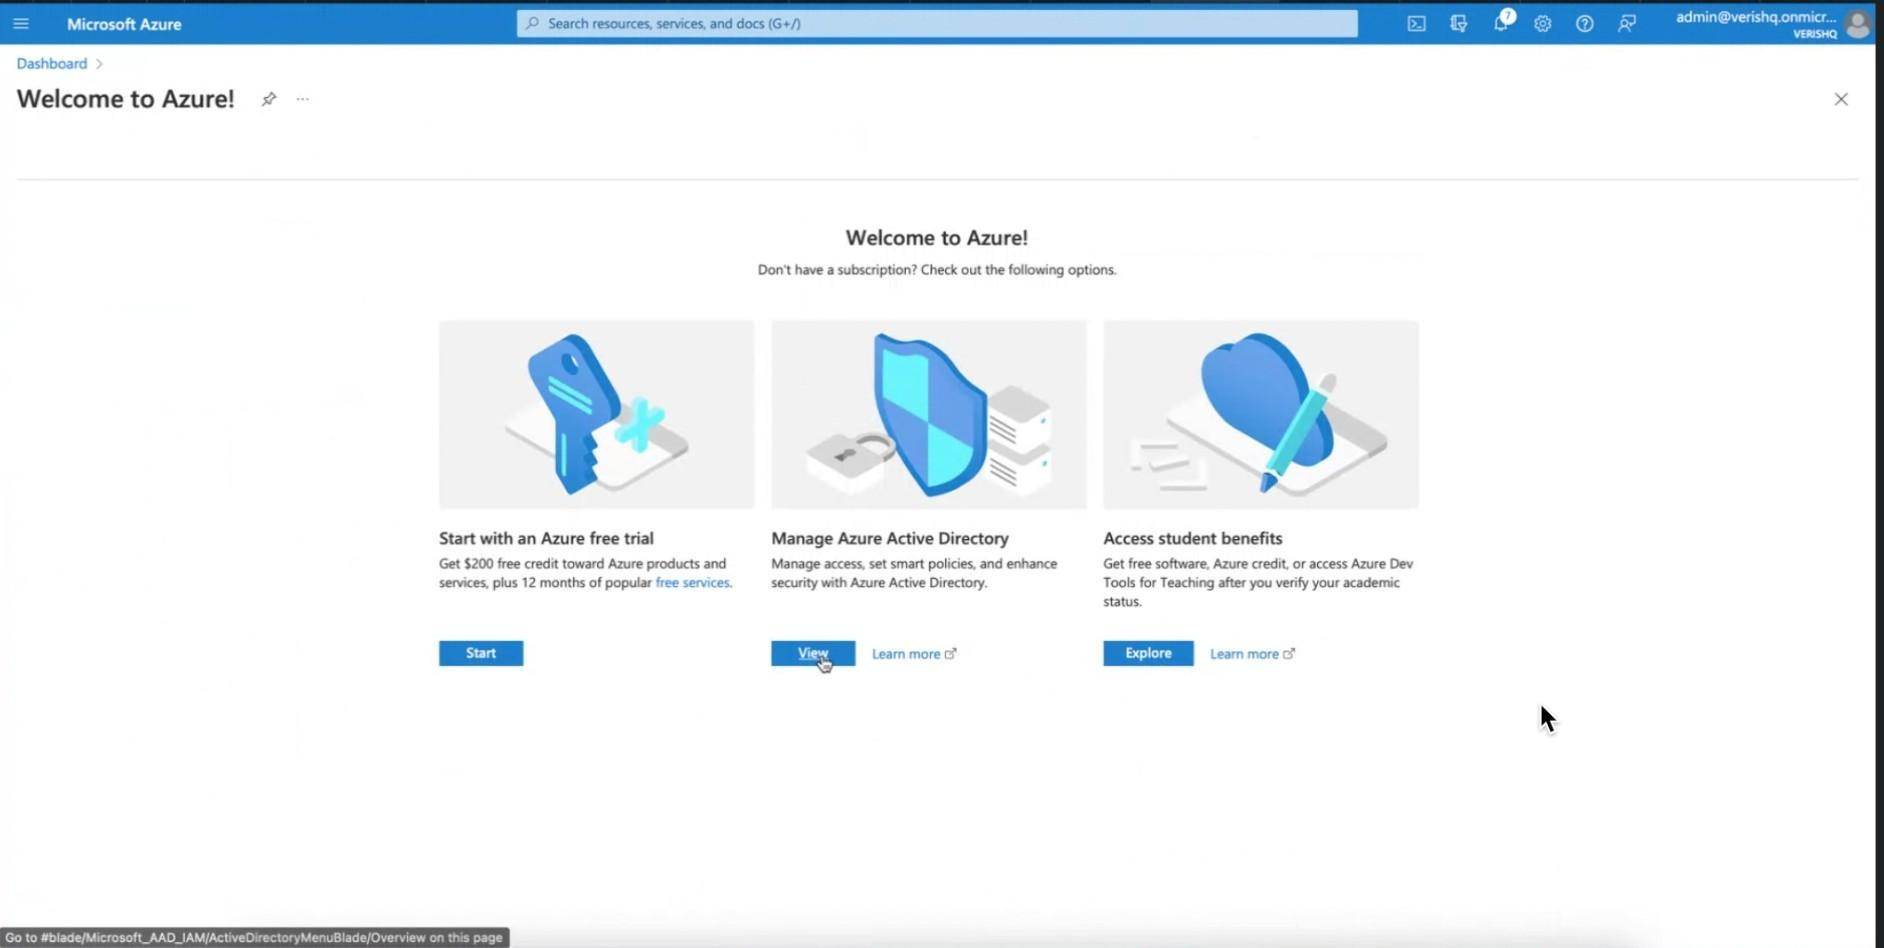
5. Under Manager Azure Directory click on View (as shown above) and you will arrive on the following screen, then click on App Registration and then New Registration as shown below
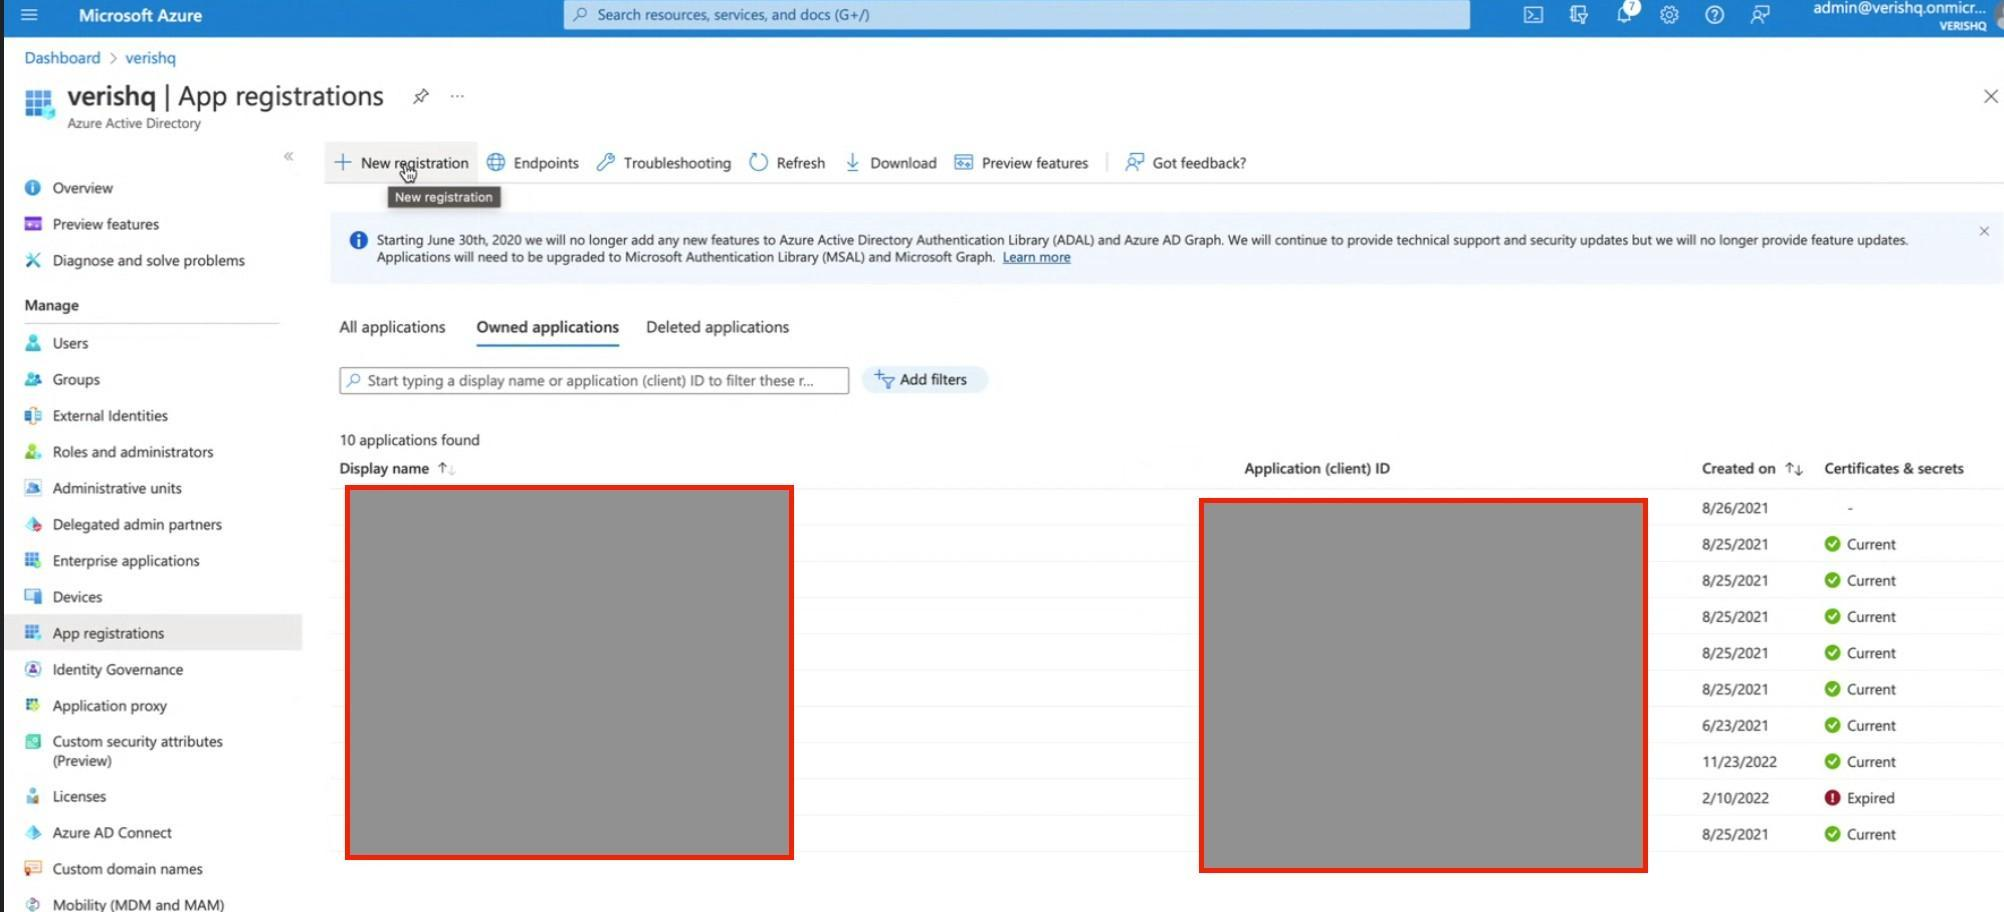
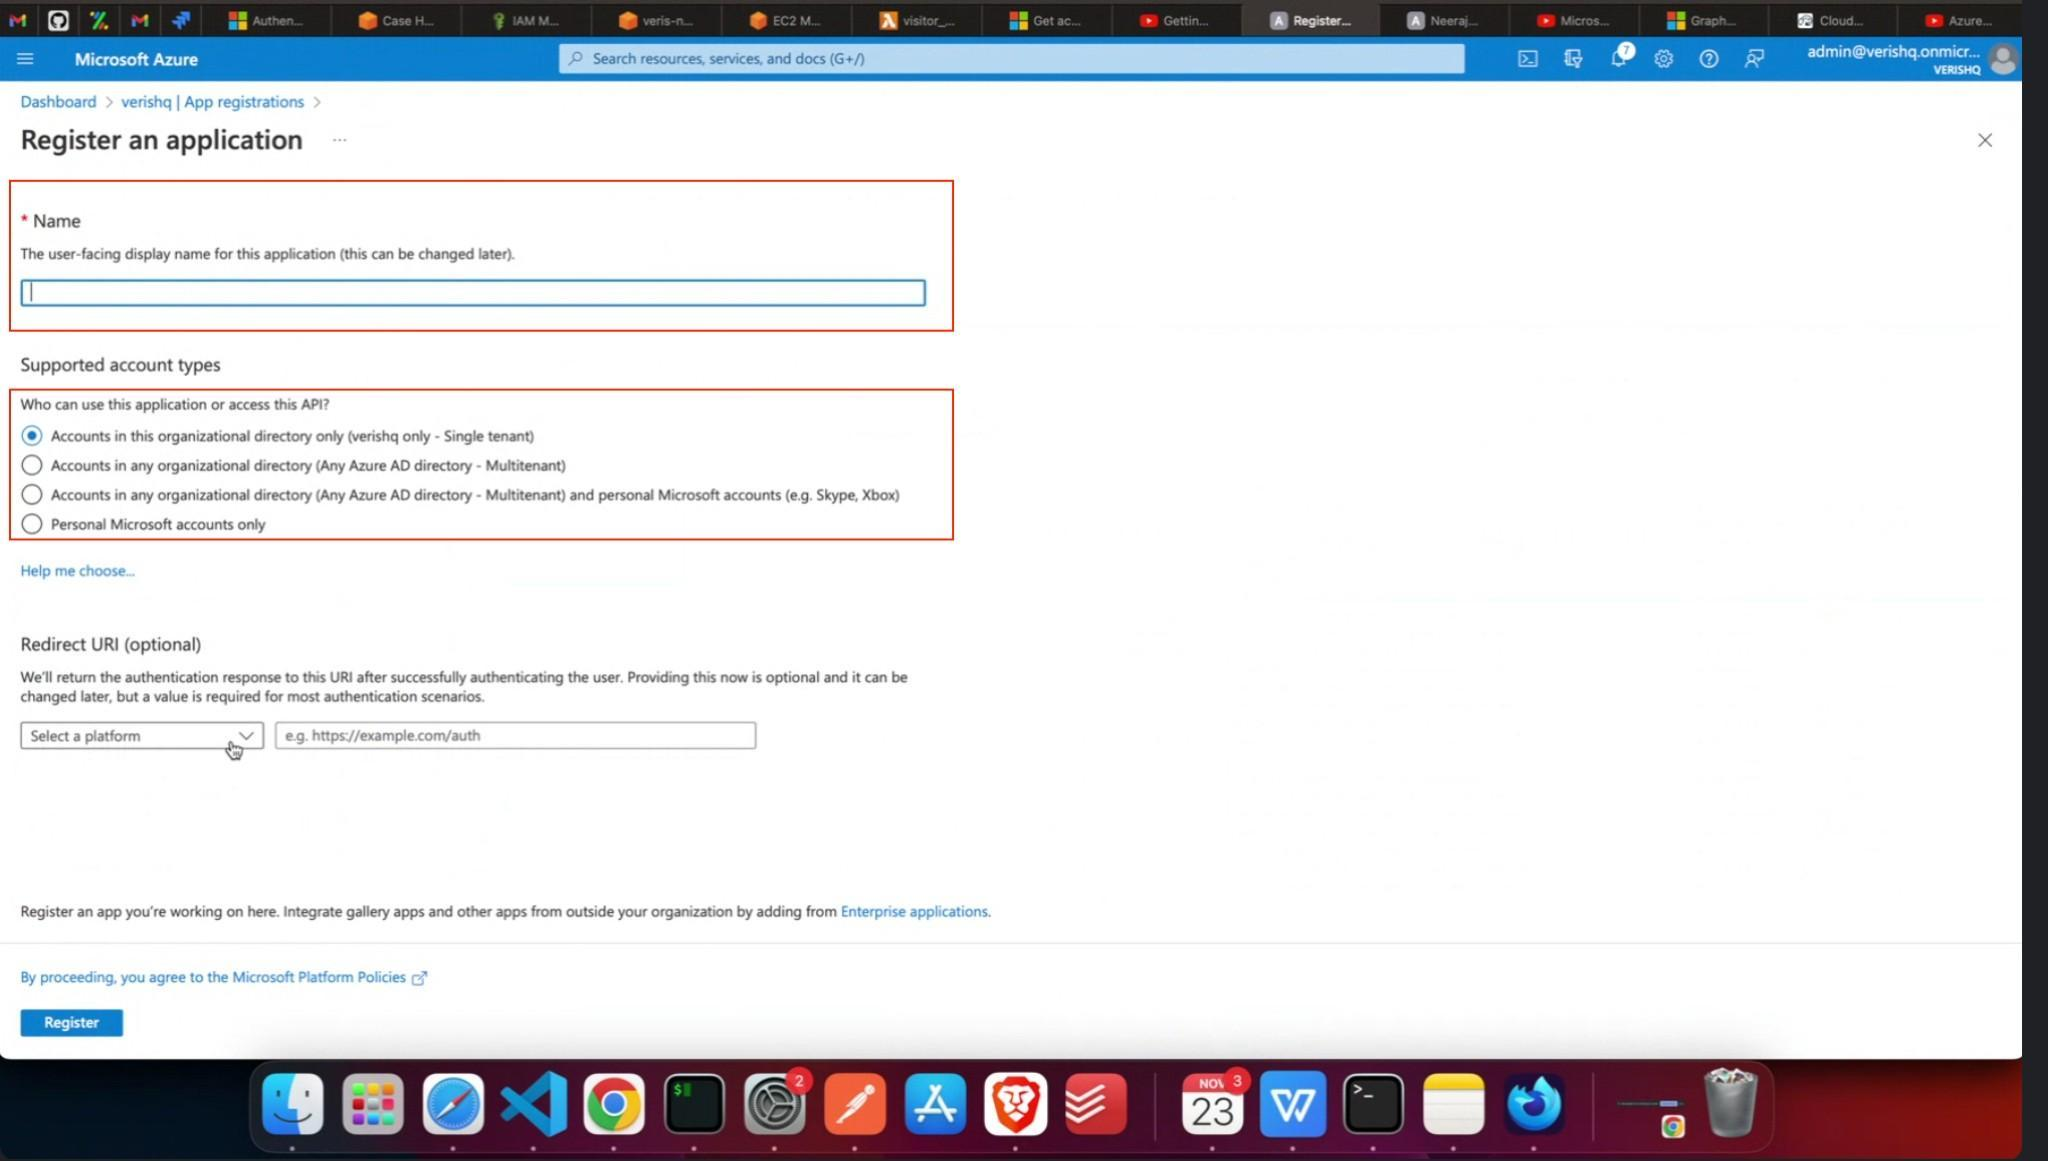
6. Enter a unique application name and select supported account types, then click on the Register button at bottom of the screen. Information entered above needs to be shared with Veris
7. Once Registration is done, you will arrive at the below screen. Click on New Client Secret
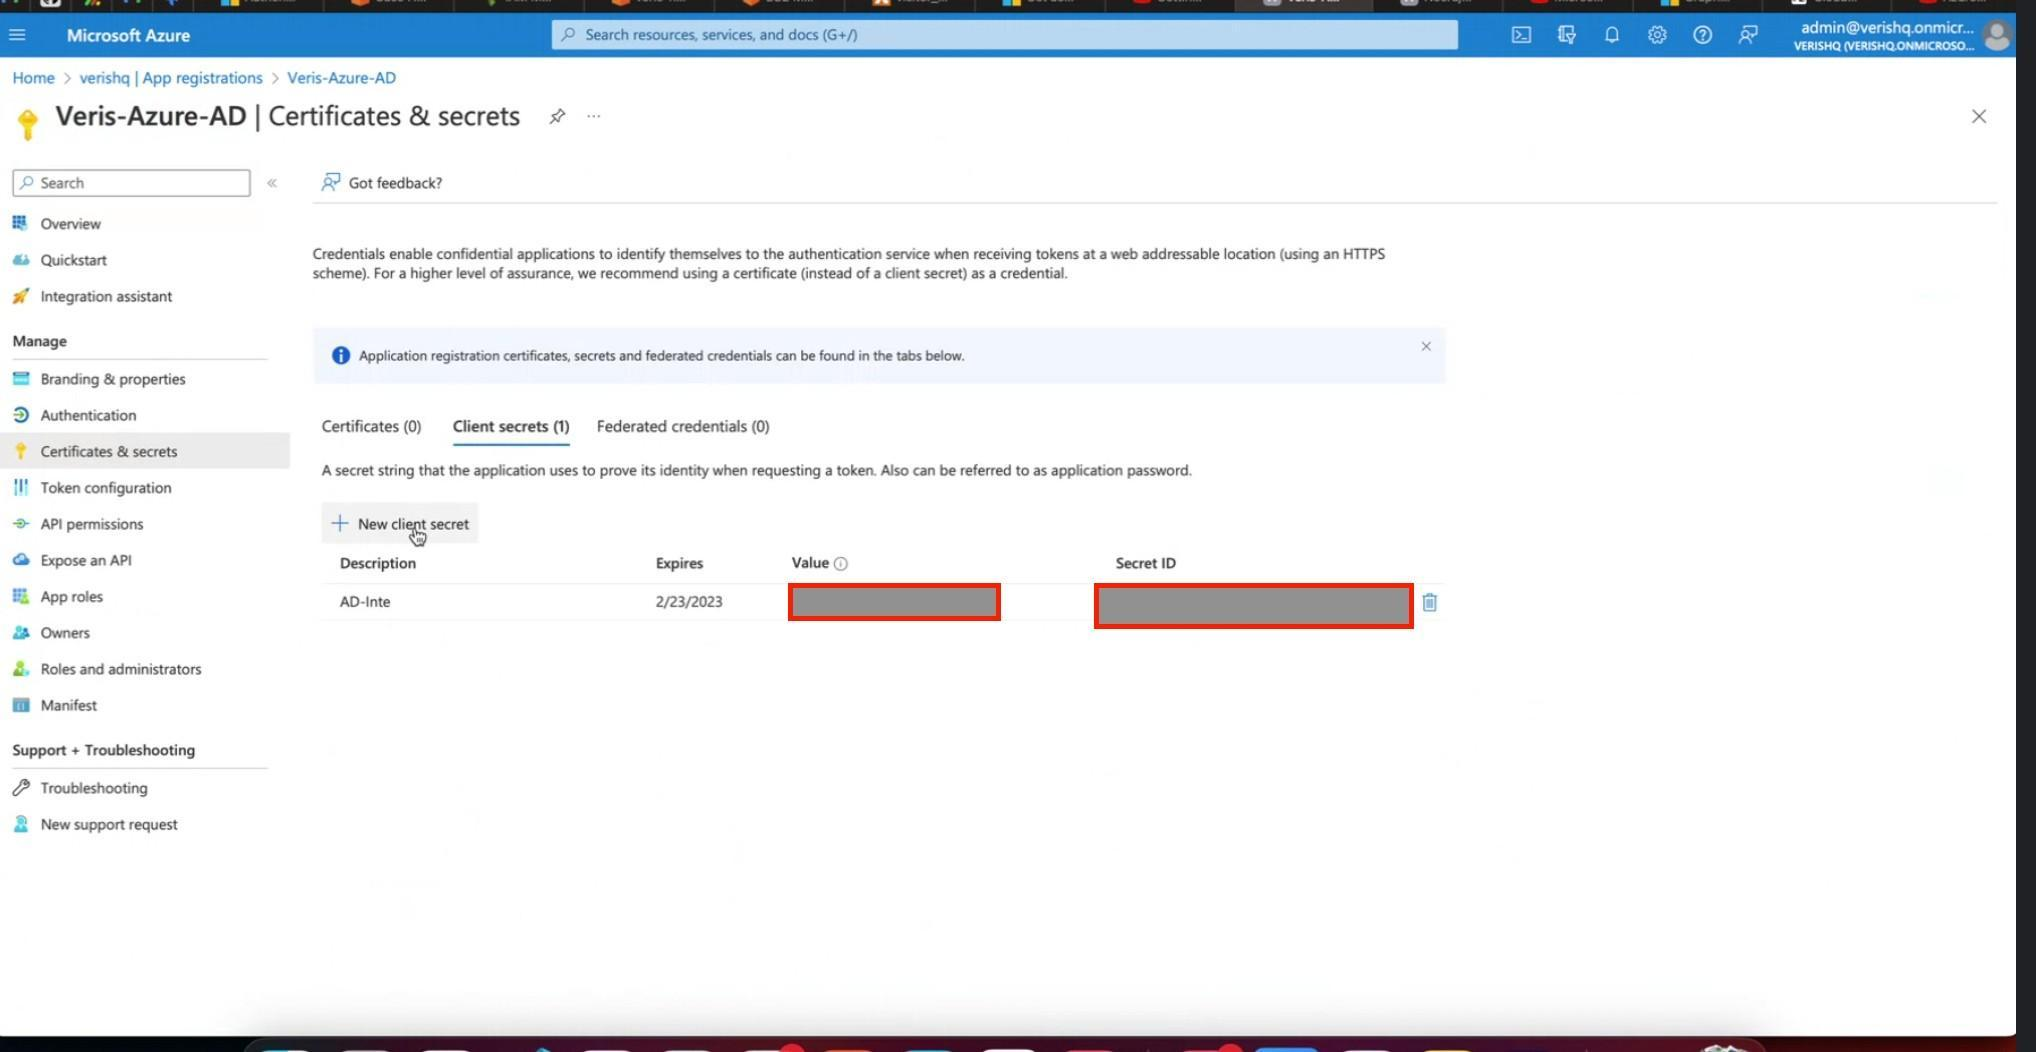
8. Please note in the above step:
a. Do not select any expiry time for client secret and choose the “Never” option
b. The Value and Secret ID of the New Client Secret will be visible only for the first time and will get masked later on.
c. Please make note of the same and share with Veris both the Value and Secret ID of the New Client Secret
9. Then go to API Permission and click on “Add a permission” as shown below:

10.Under Select an API >> Microsoft API click on Microsoft Graph as shown below
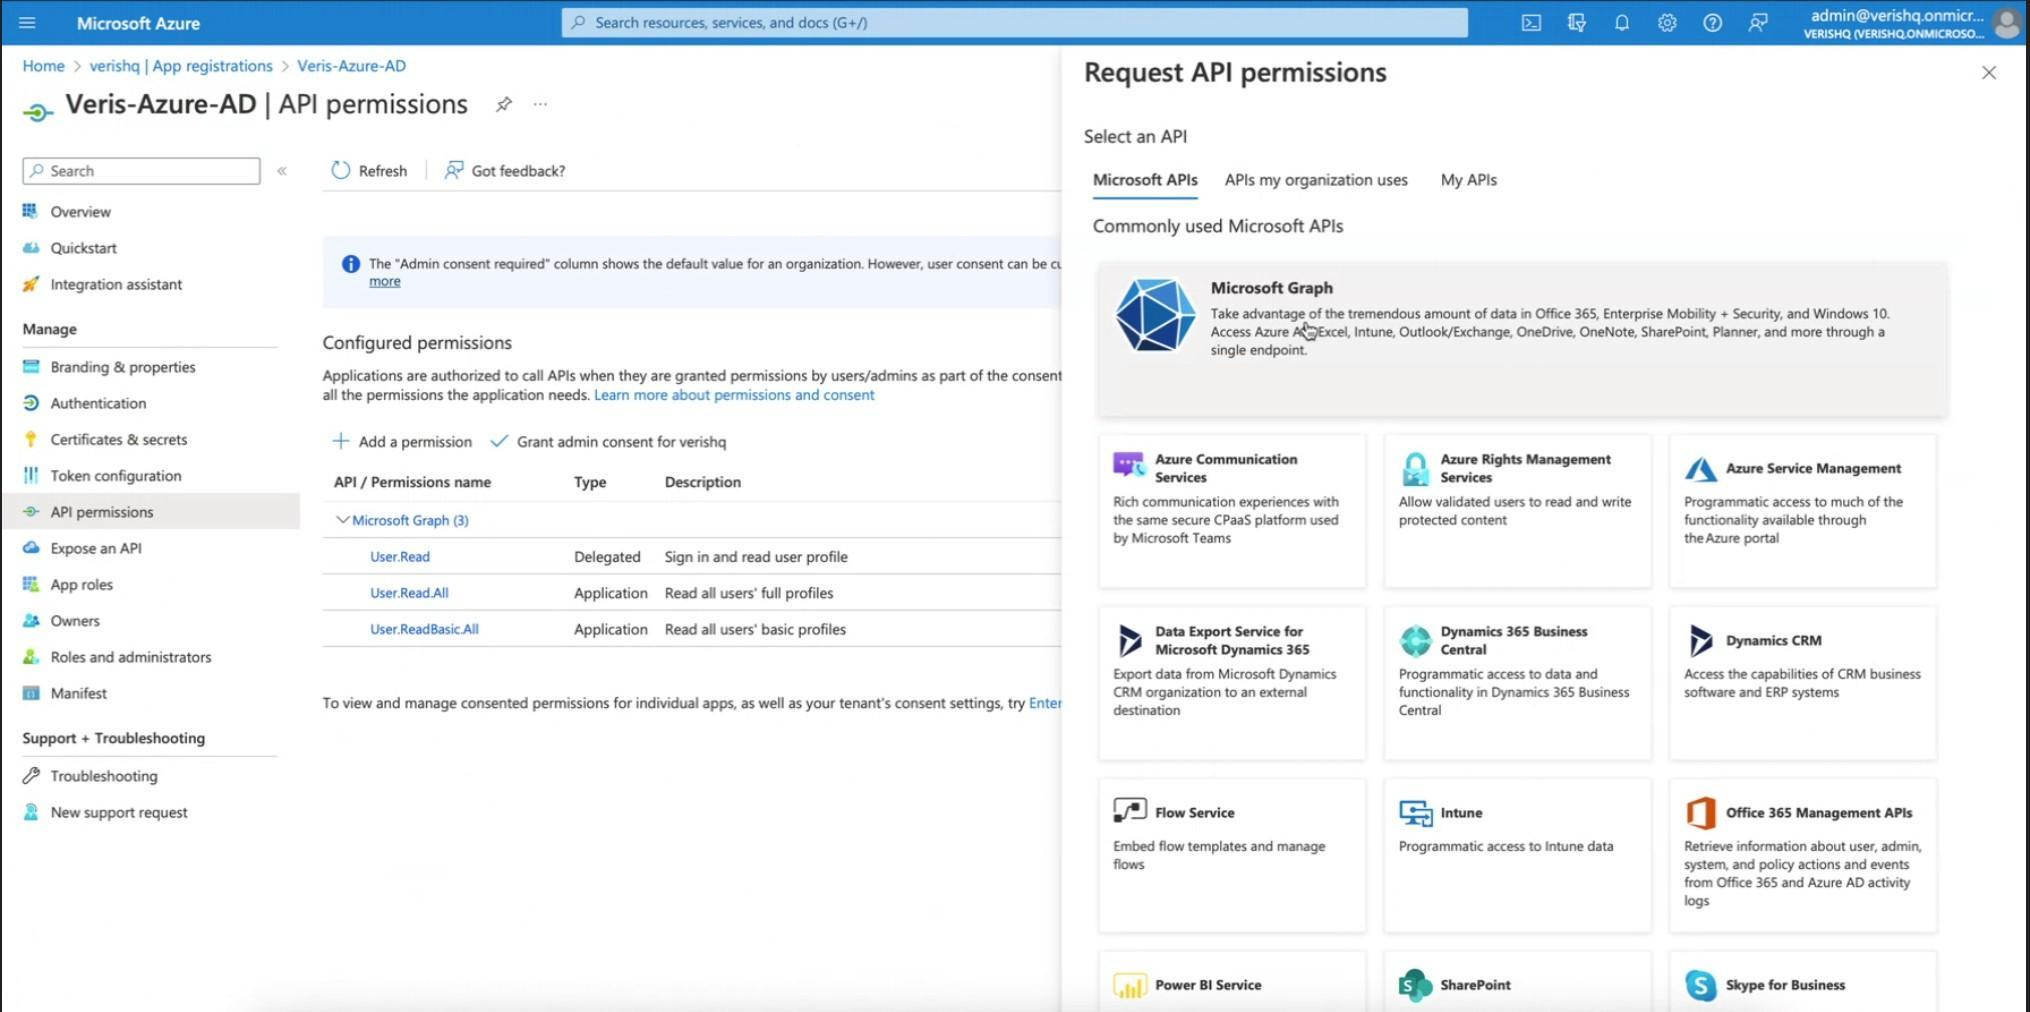
11. Then click on Application Permission as shown below
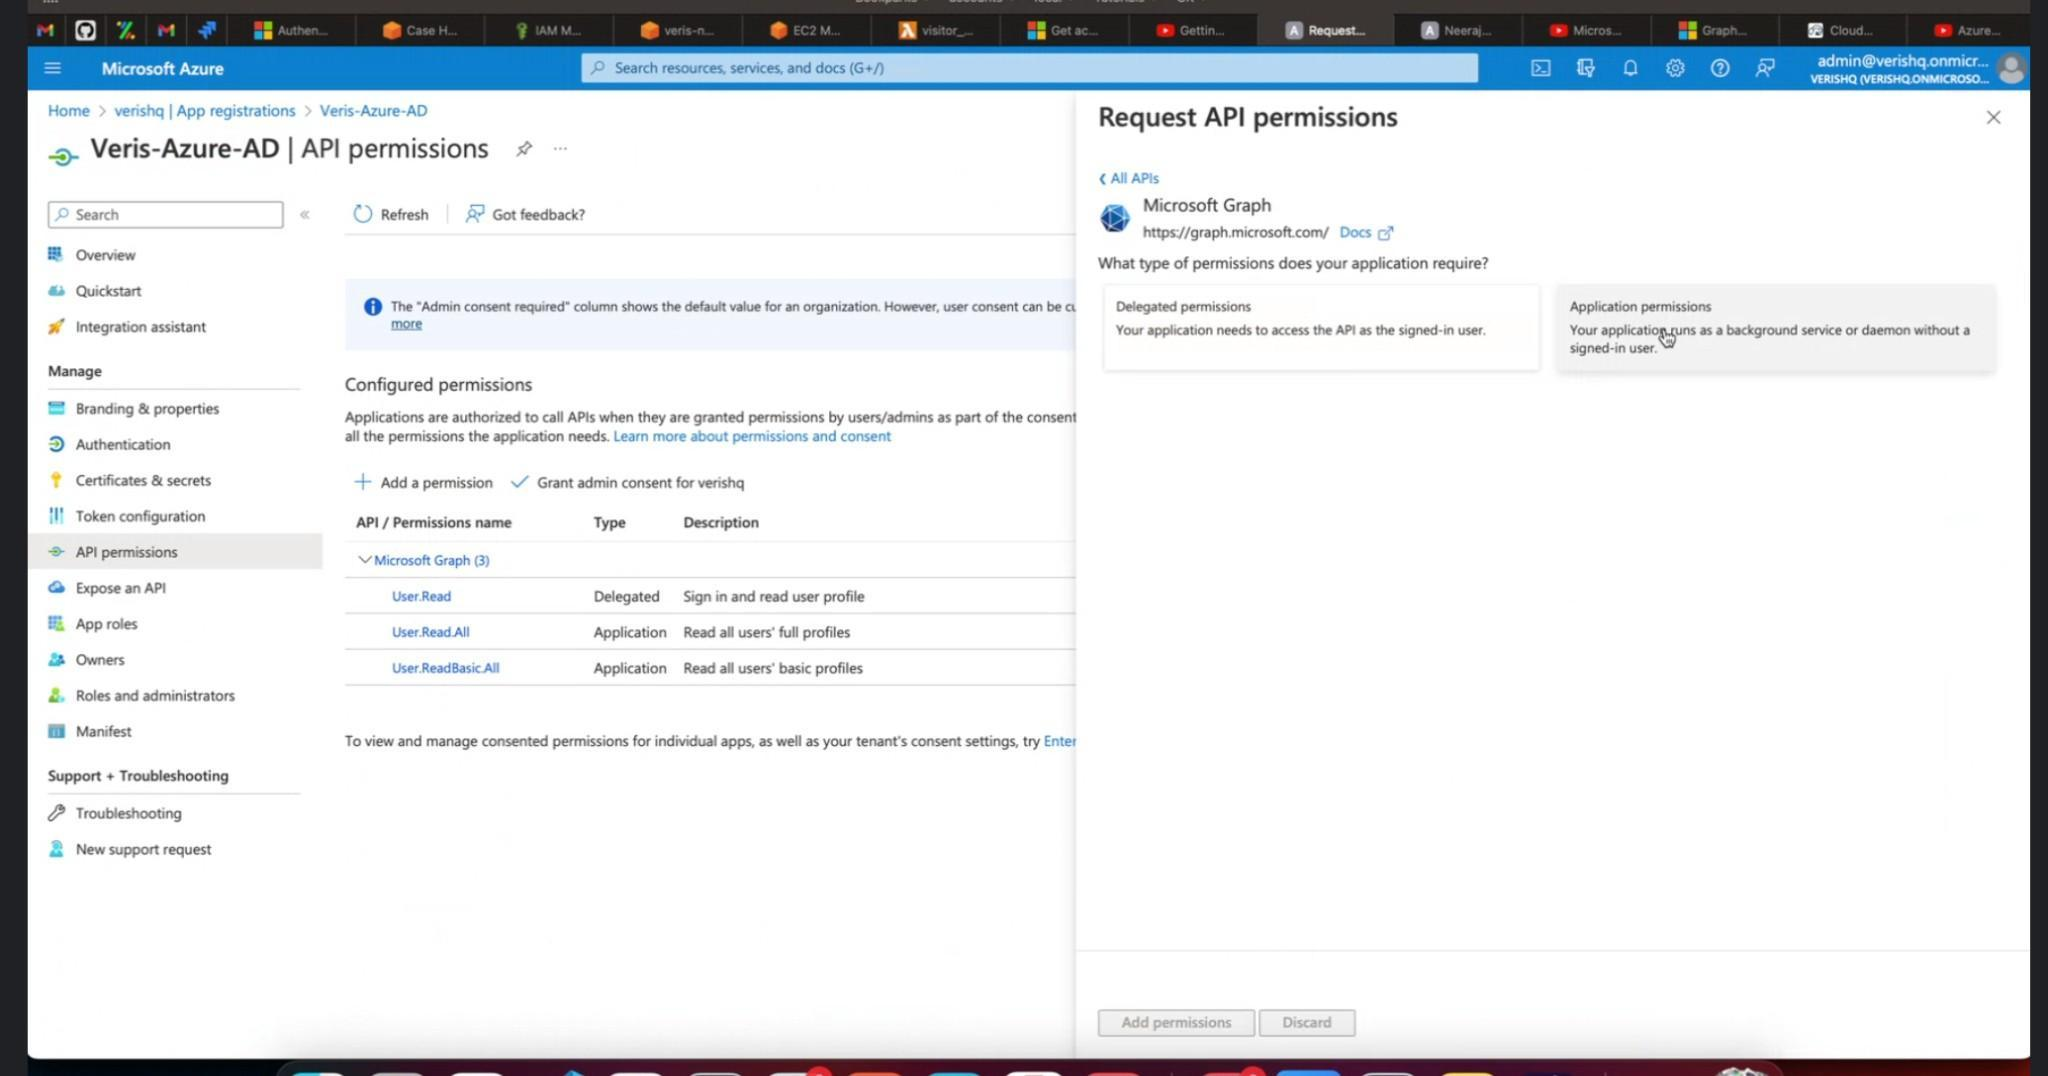
12. Under Select Permission search for User
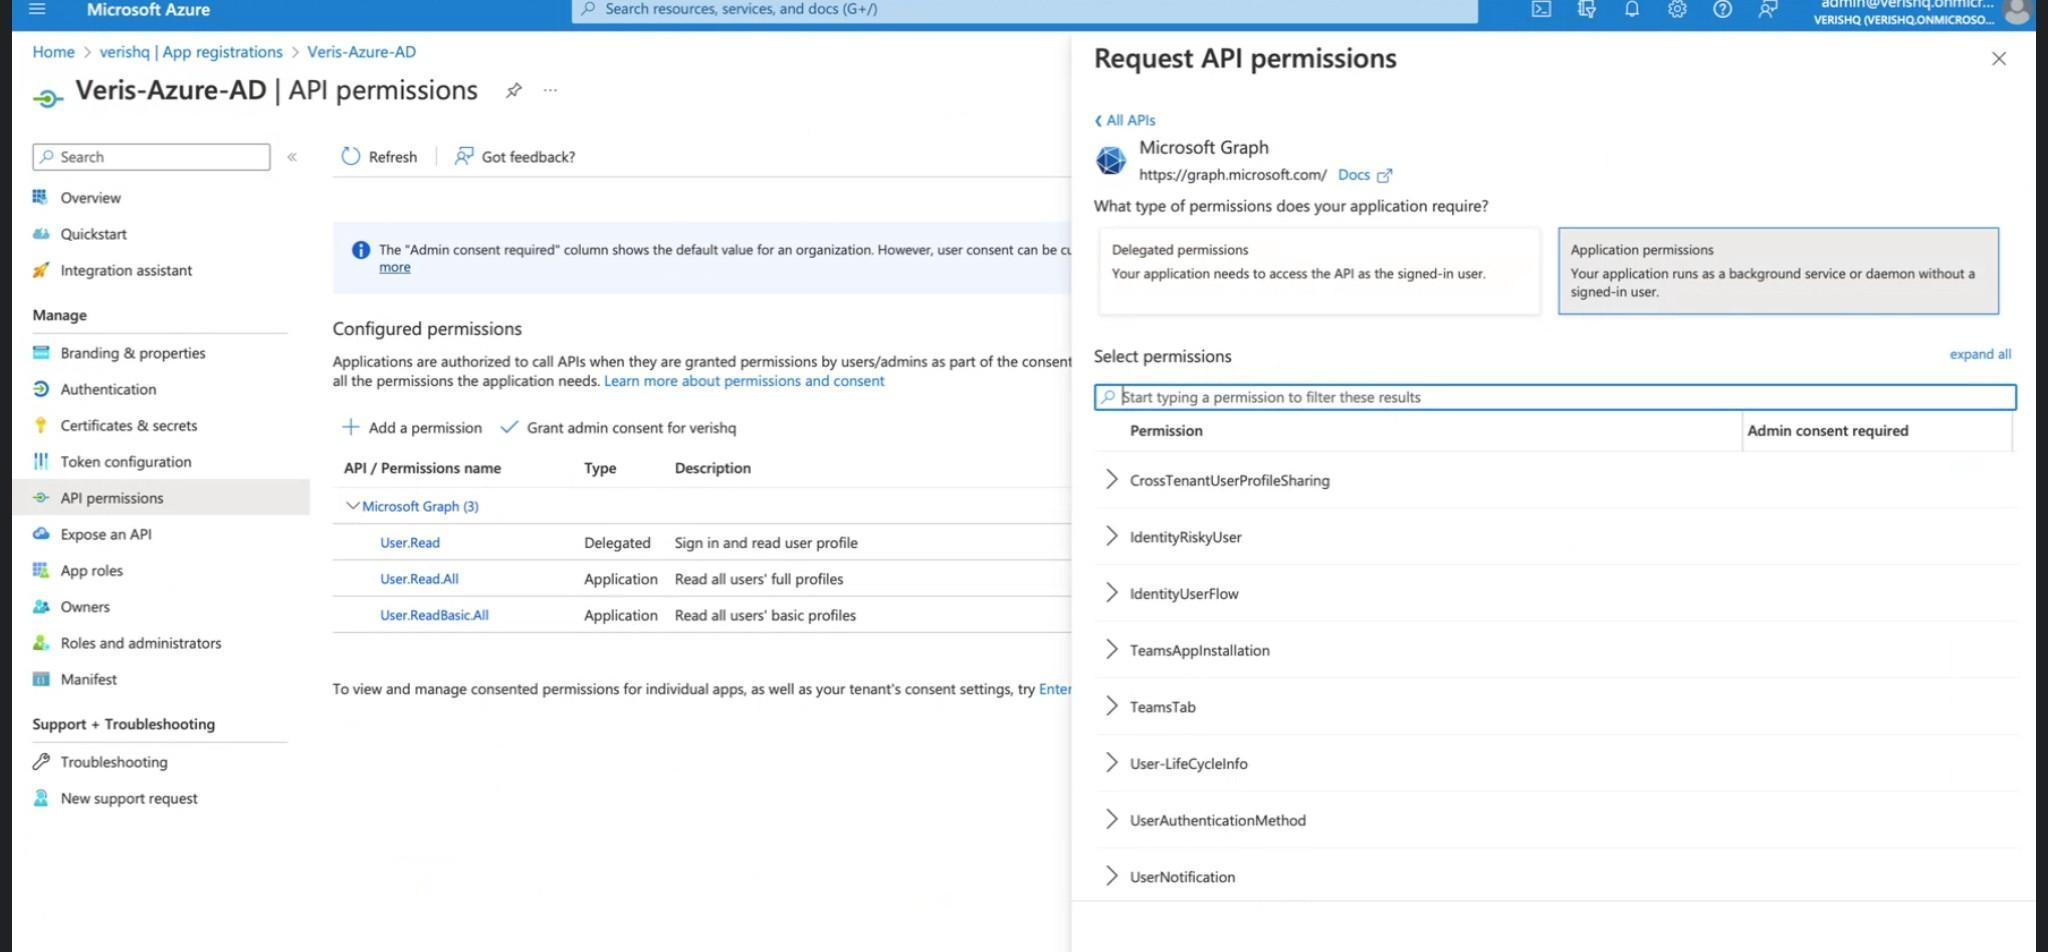
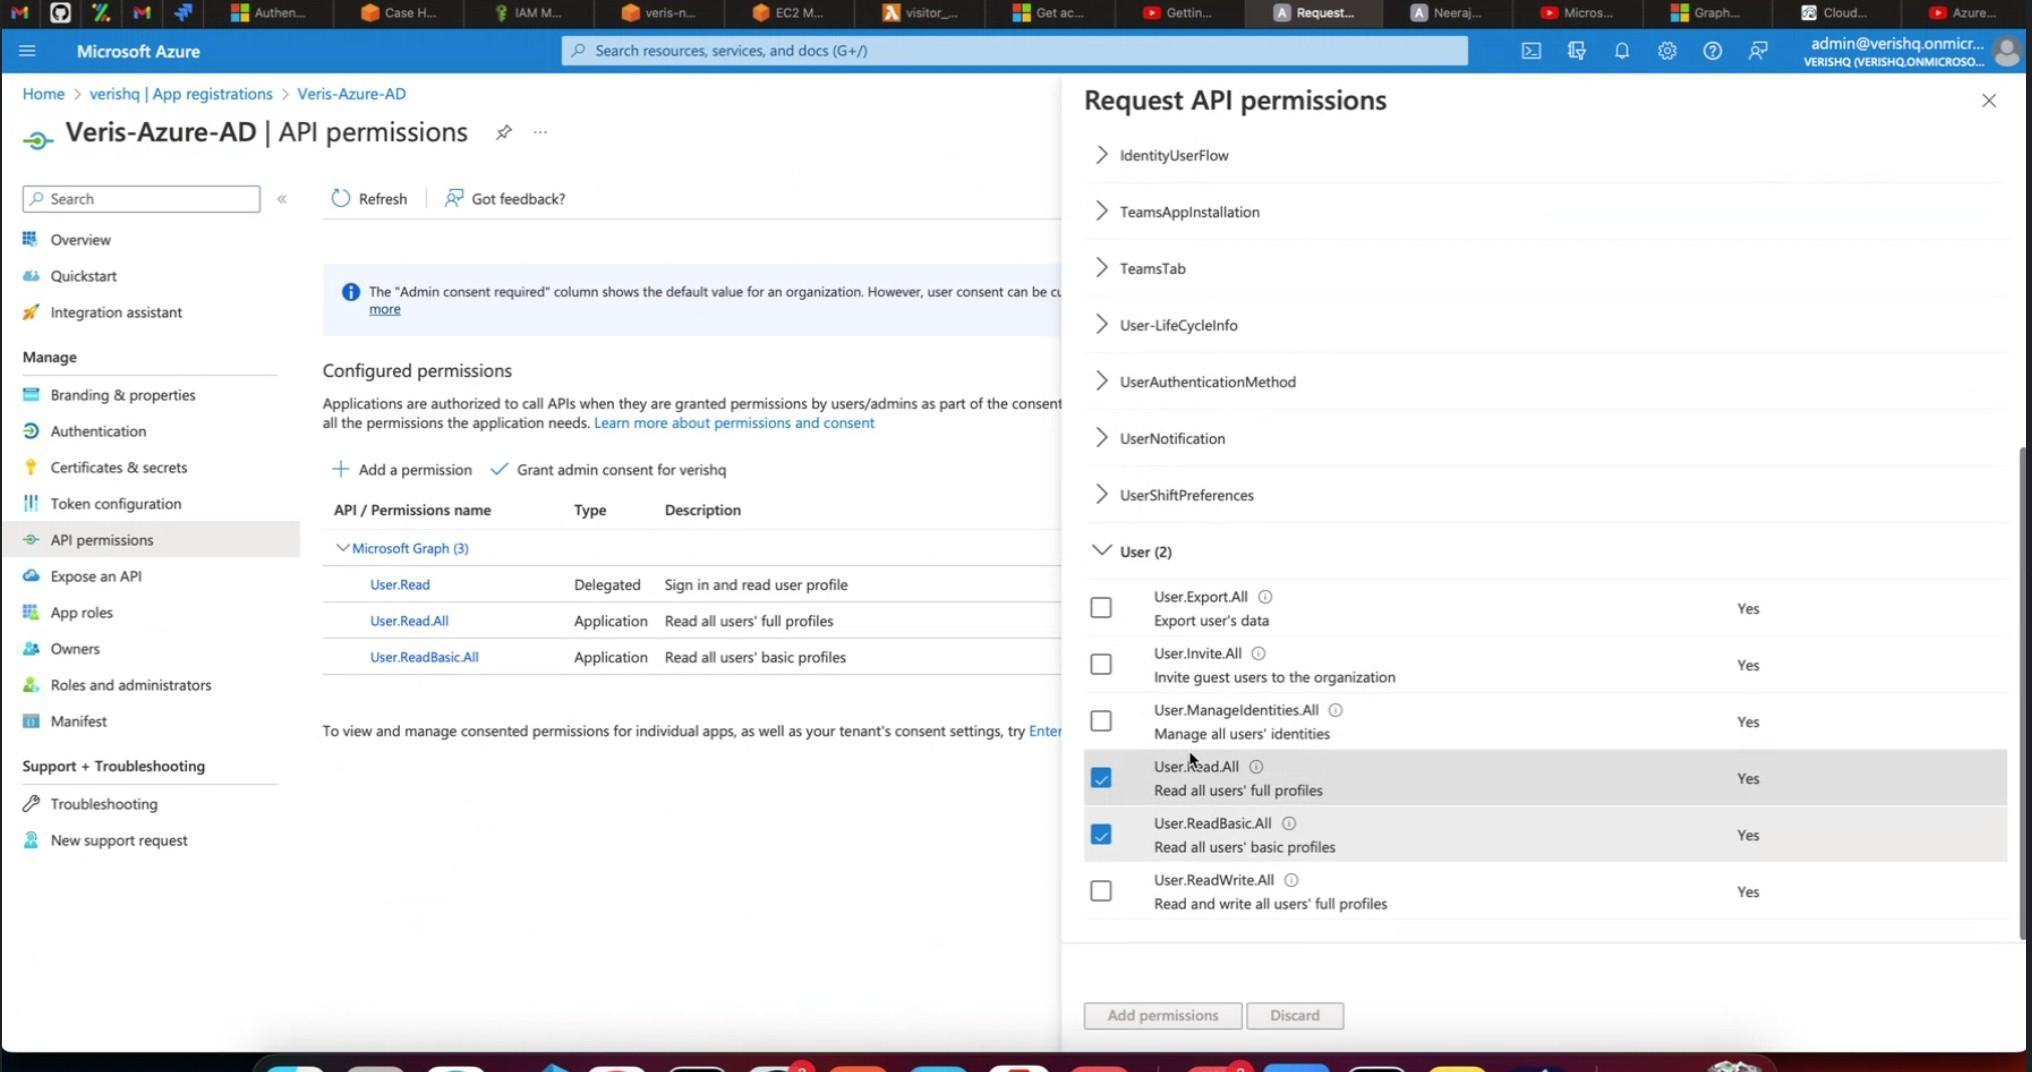
13. When we search for it, we will see the options in the dropdown similar to those shown below, select User.Read.All and User.ReadBasic.All and click on Add Permissions
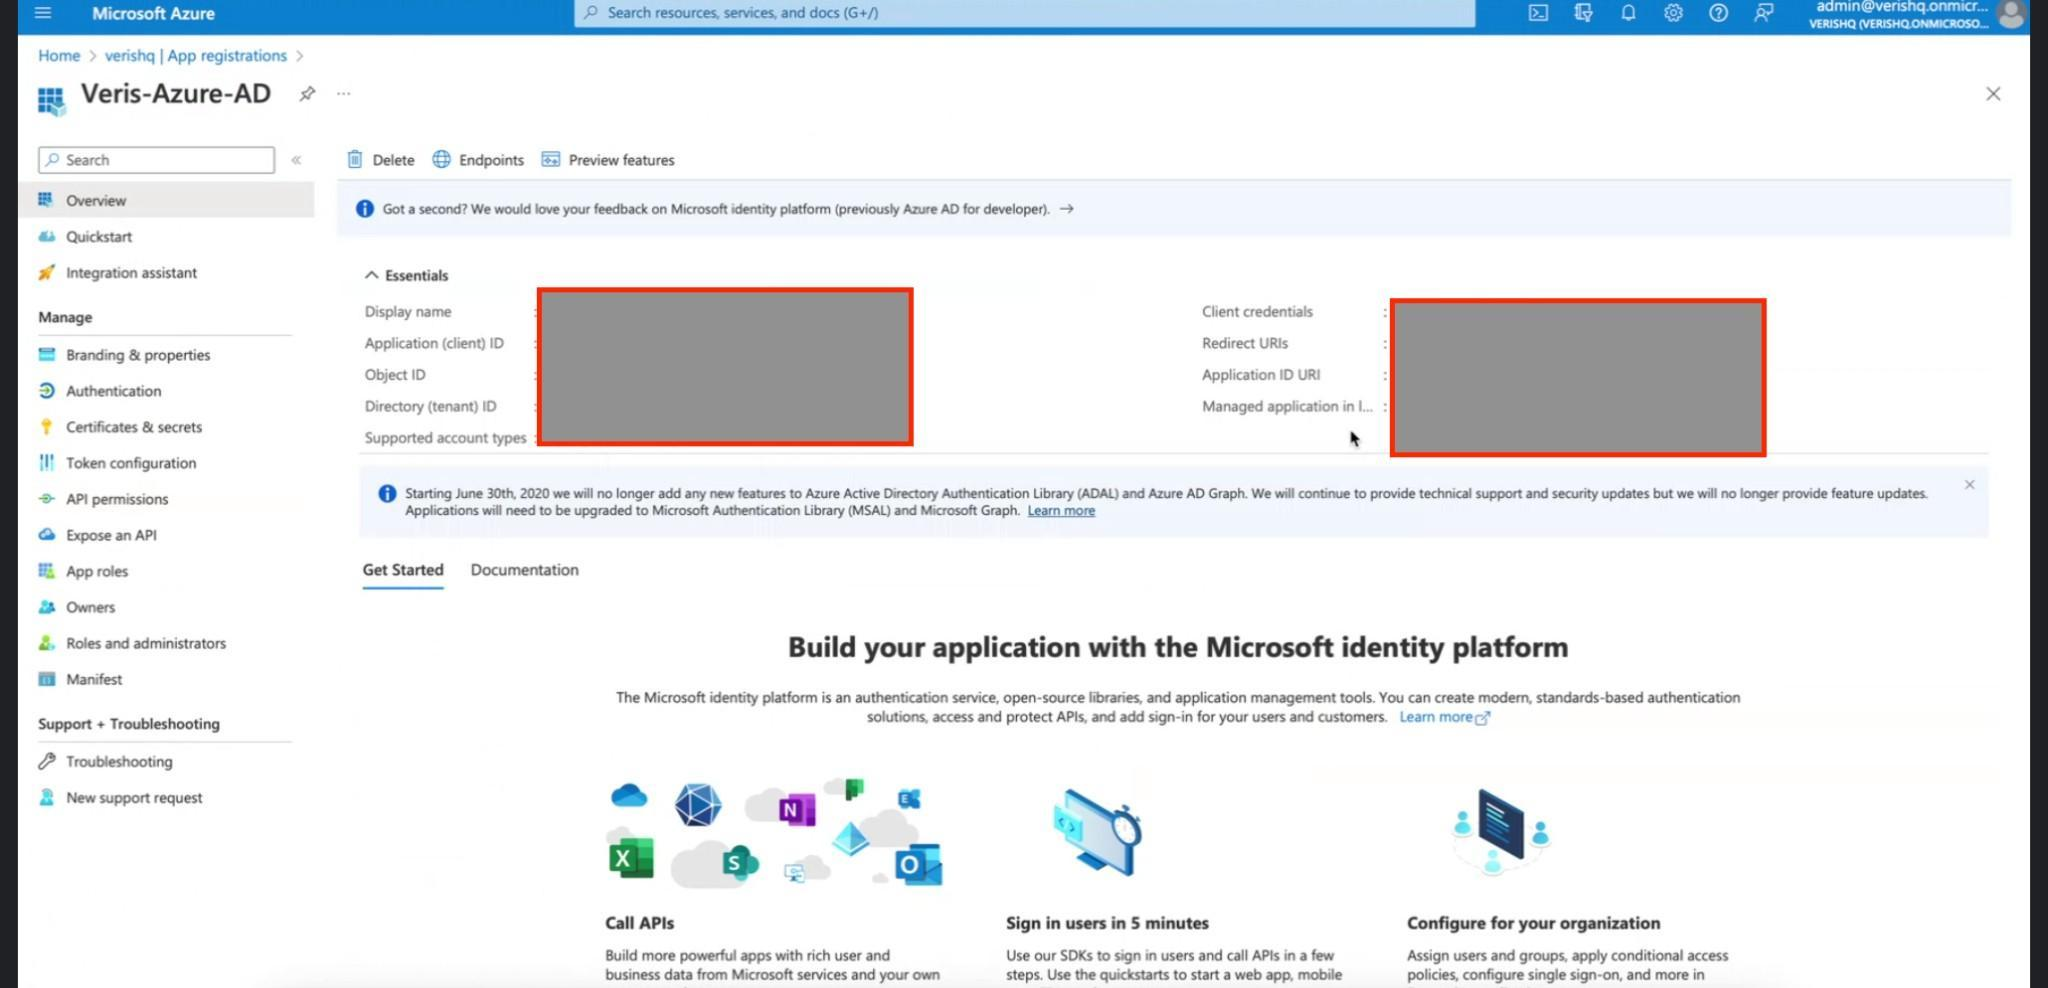
14. Then go to Azure Portal Home, Click on Overview. Under Overview there is certain Basic Information that is masked. The same needs to be shared with Veris.
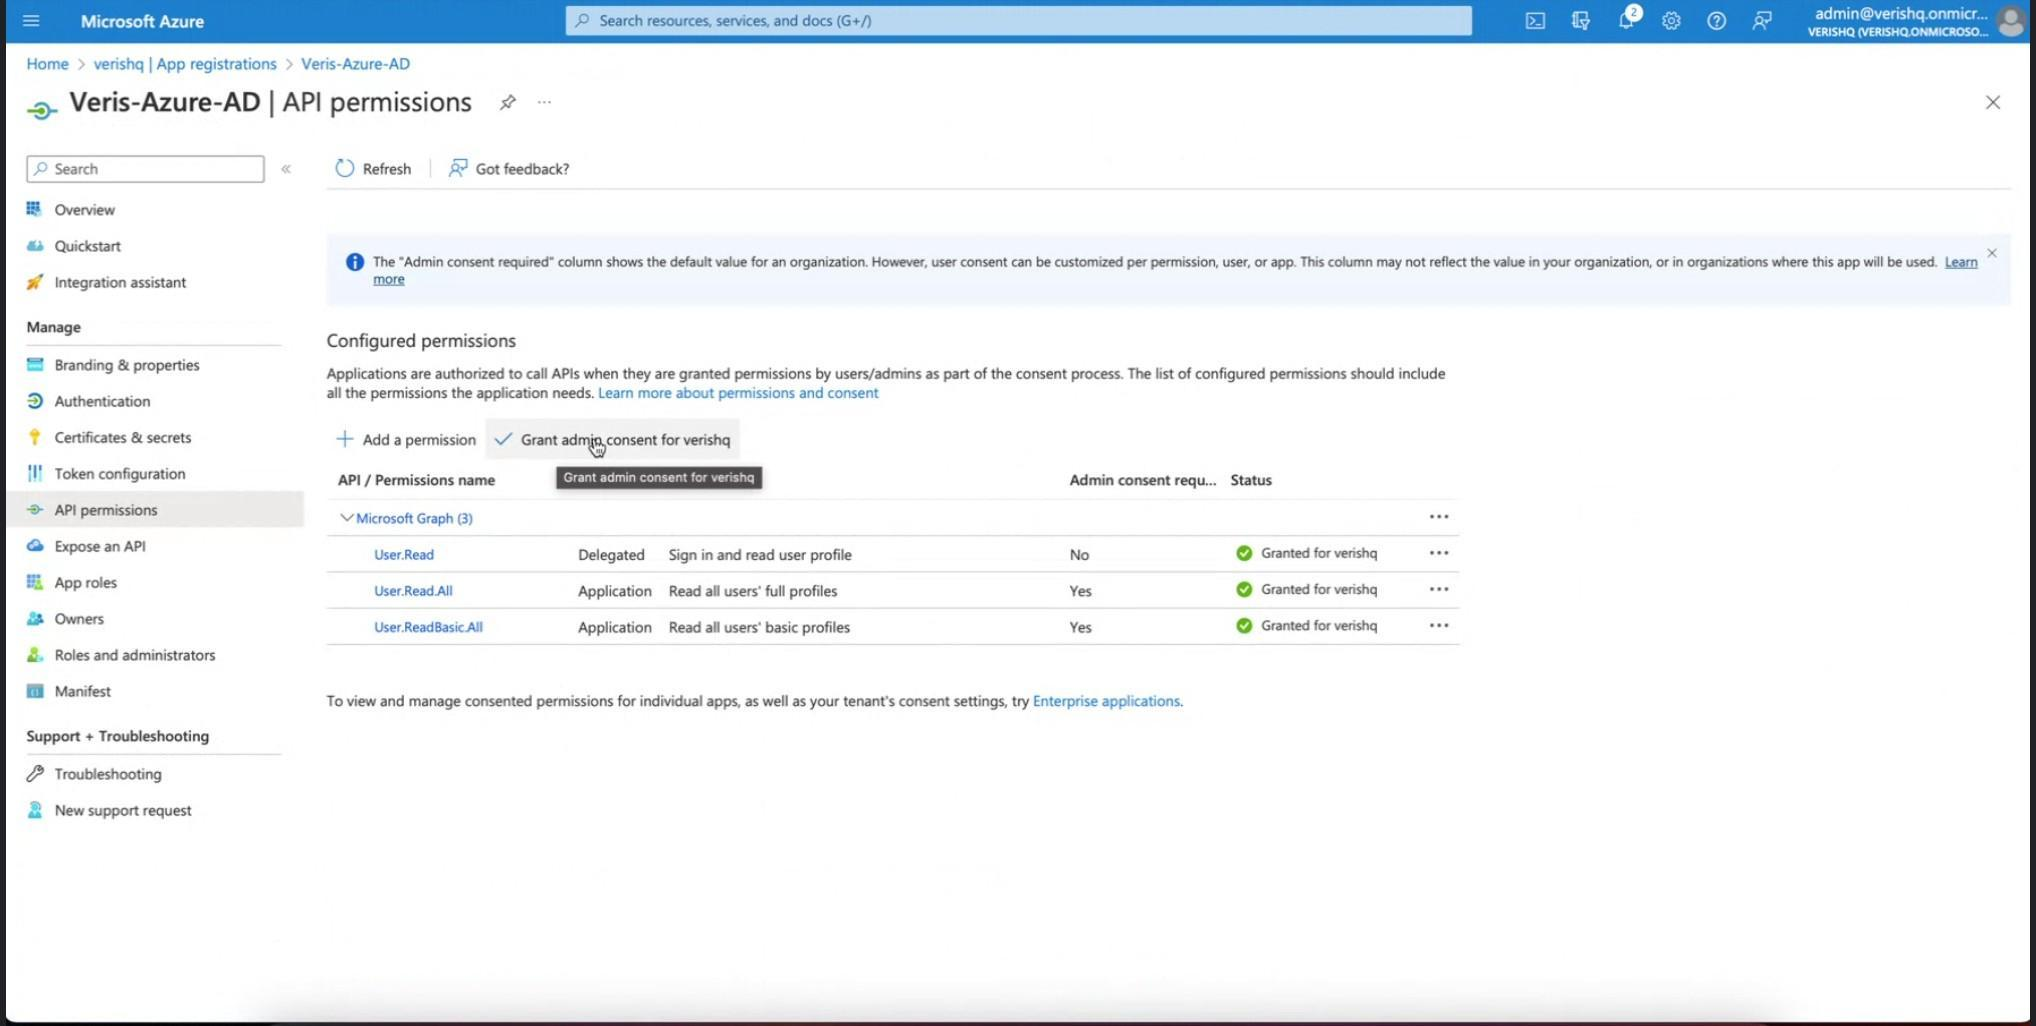
15. Then go to API Permissions and click on Grant admin consent for "name of registered app"
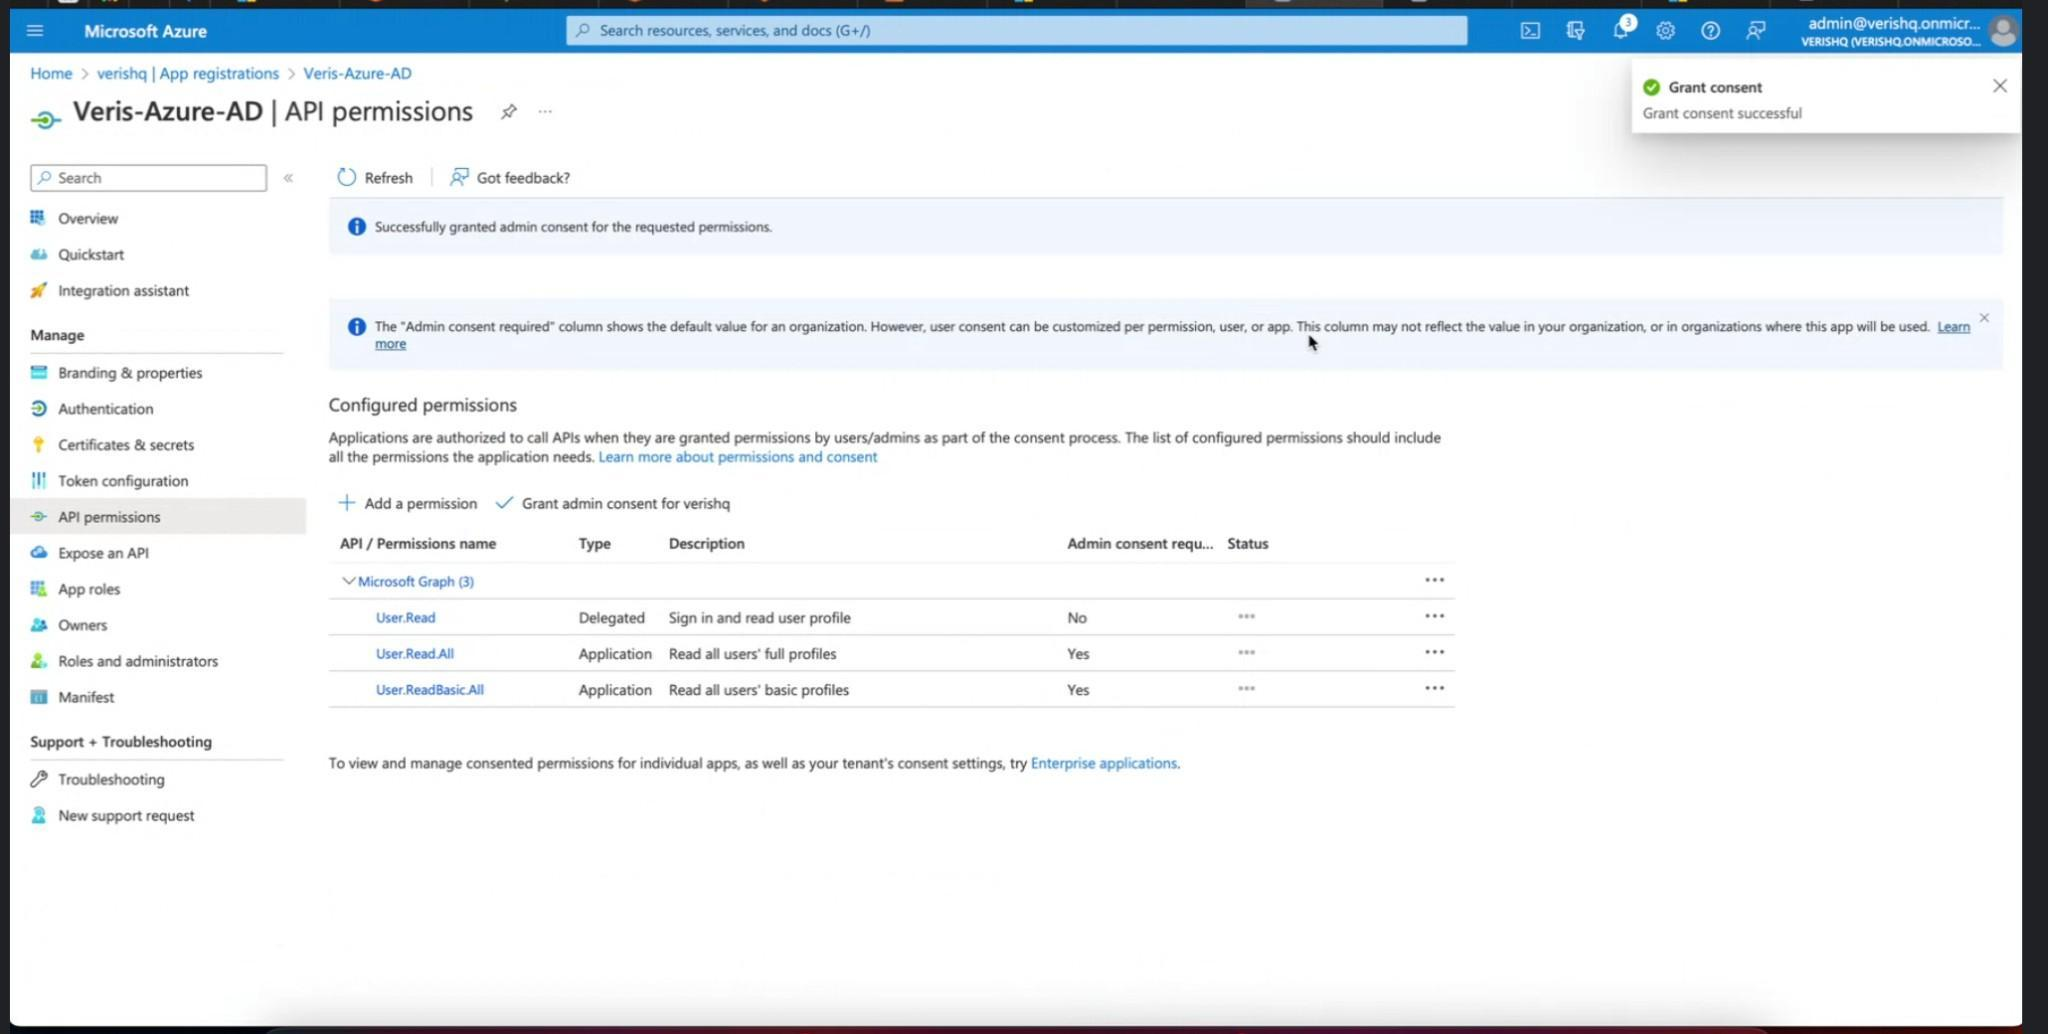
16. You will see the below change in Status Column, citing “Granted for "registered application name" as shown below
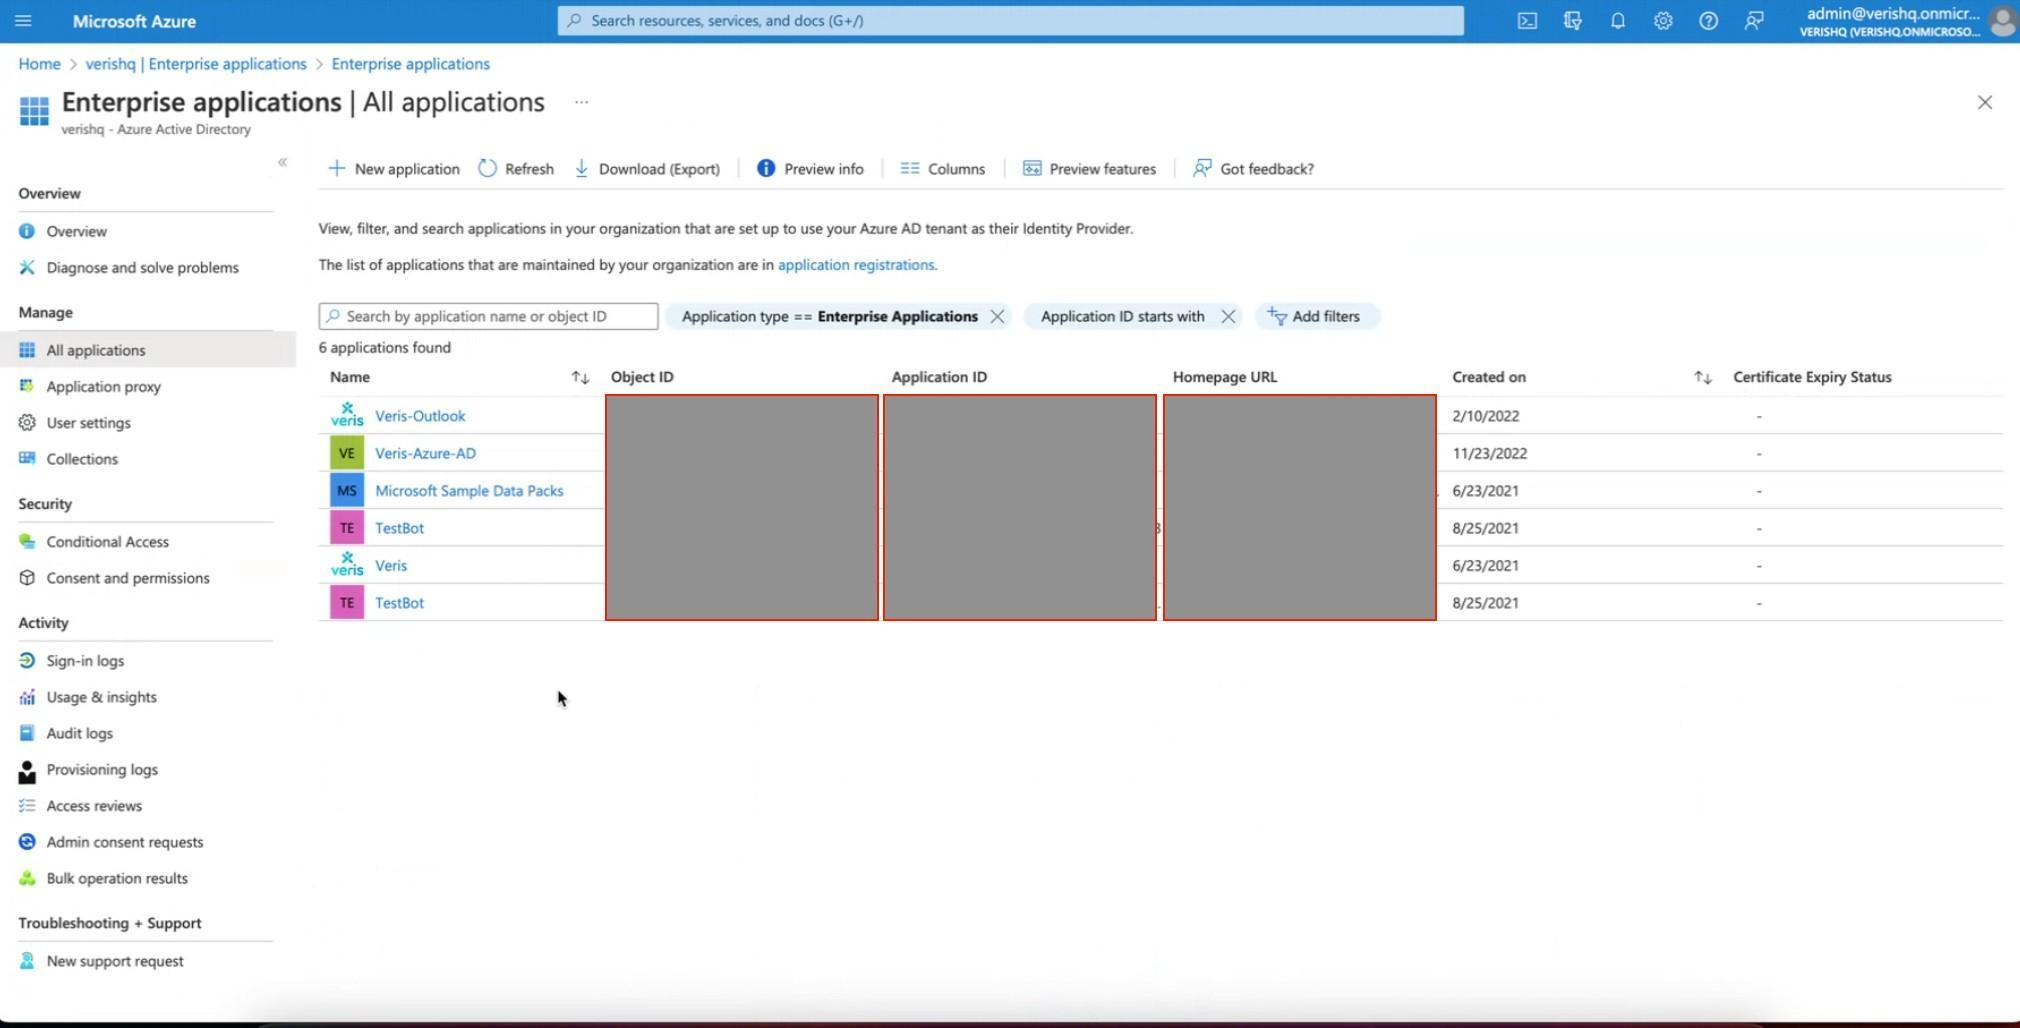
17. Then go to Enterprise Applications >> All Applications. Then Select the Application registered in Step 6 from the list of registered apps.
18. Once done, then go to User and Groups, and select pan-India India employees (you need to provide access to this to your employees who all needed to be provisioned in Veris MemberBook)
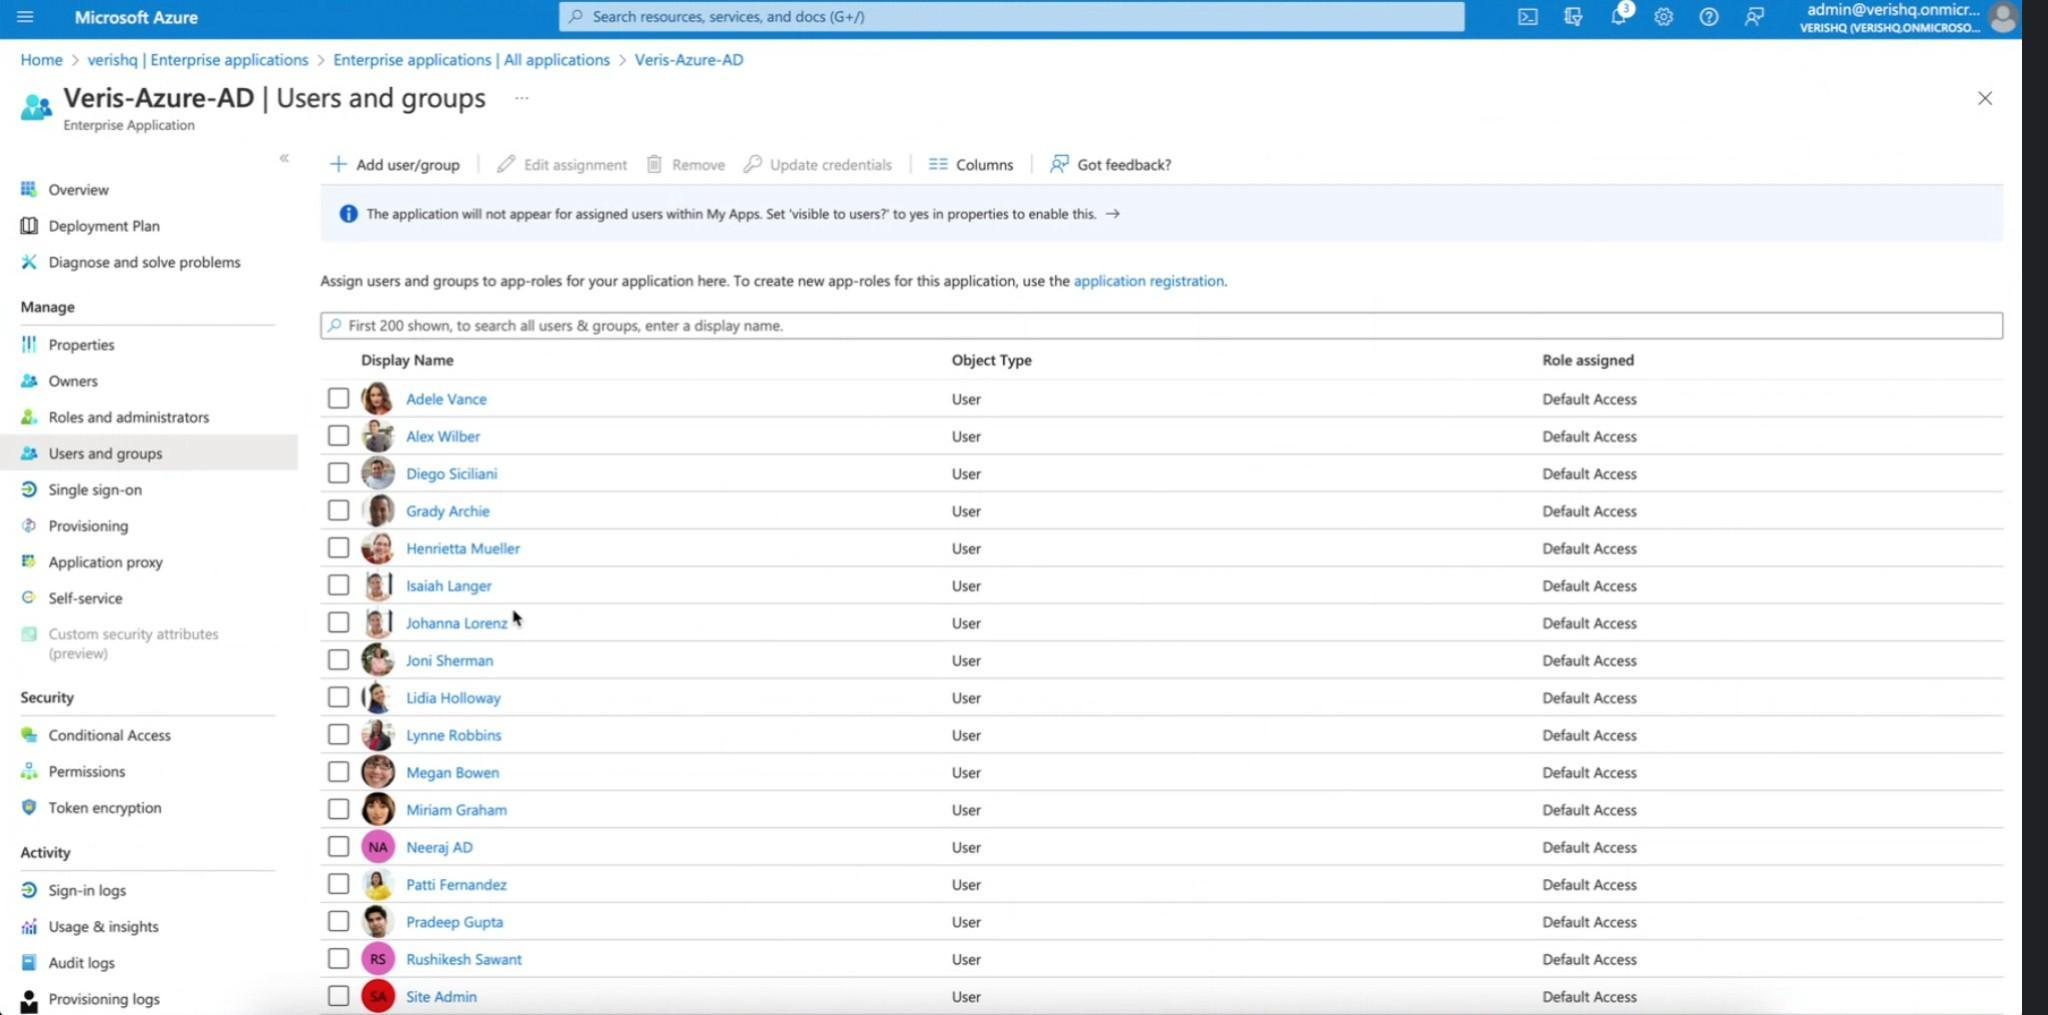
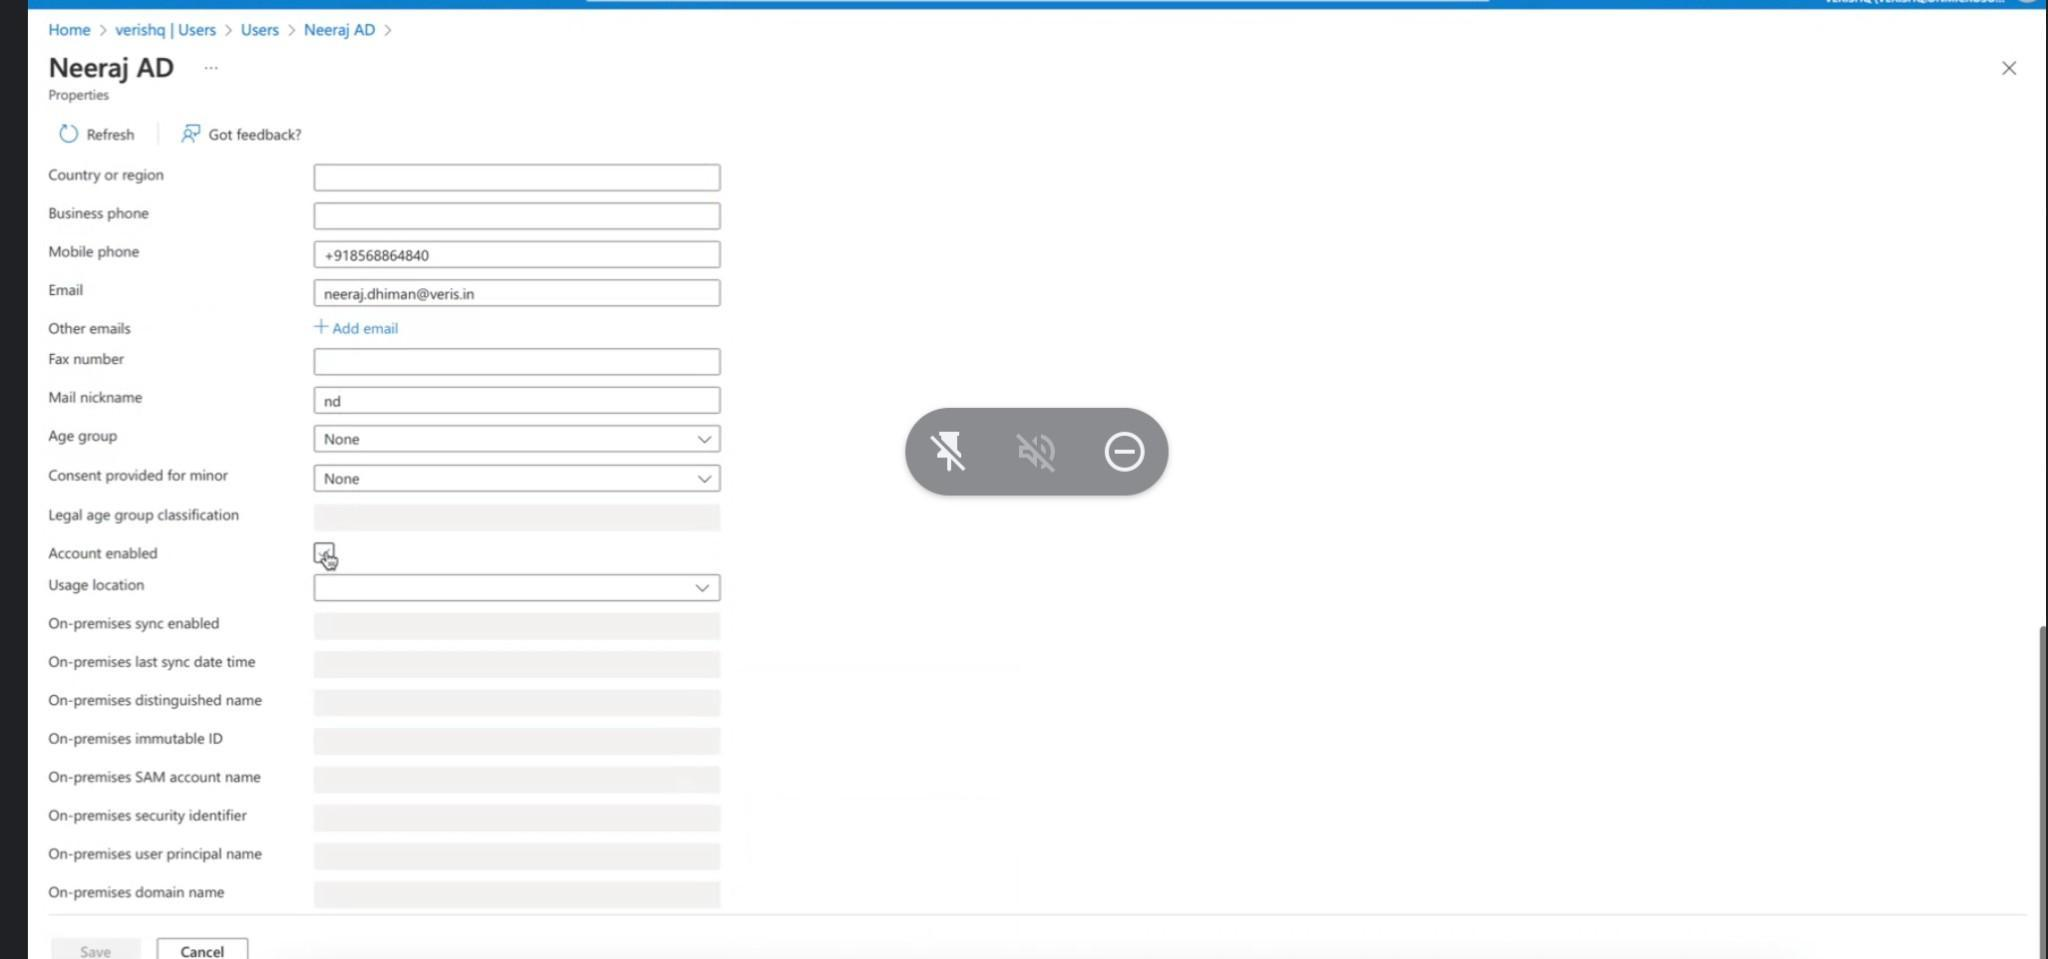
19. Click on any of the users to understand what fields are available for mapping with Veris - as per us it is First name, Last Name, Job Title, Department, Employee ID and Email
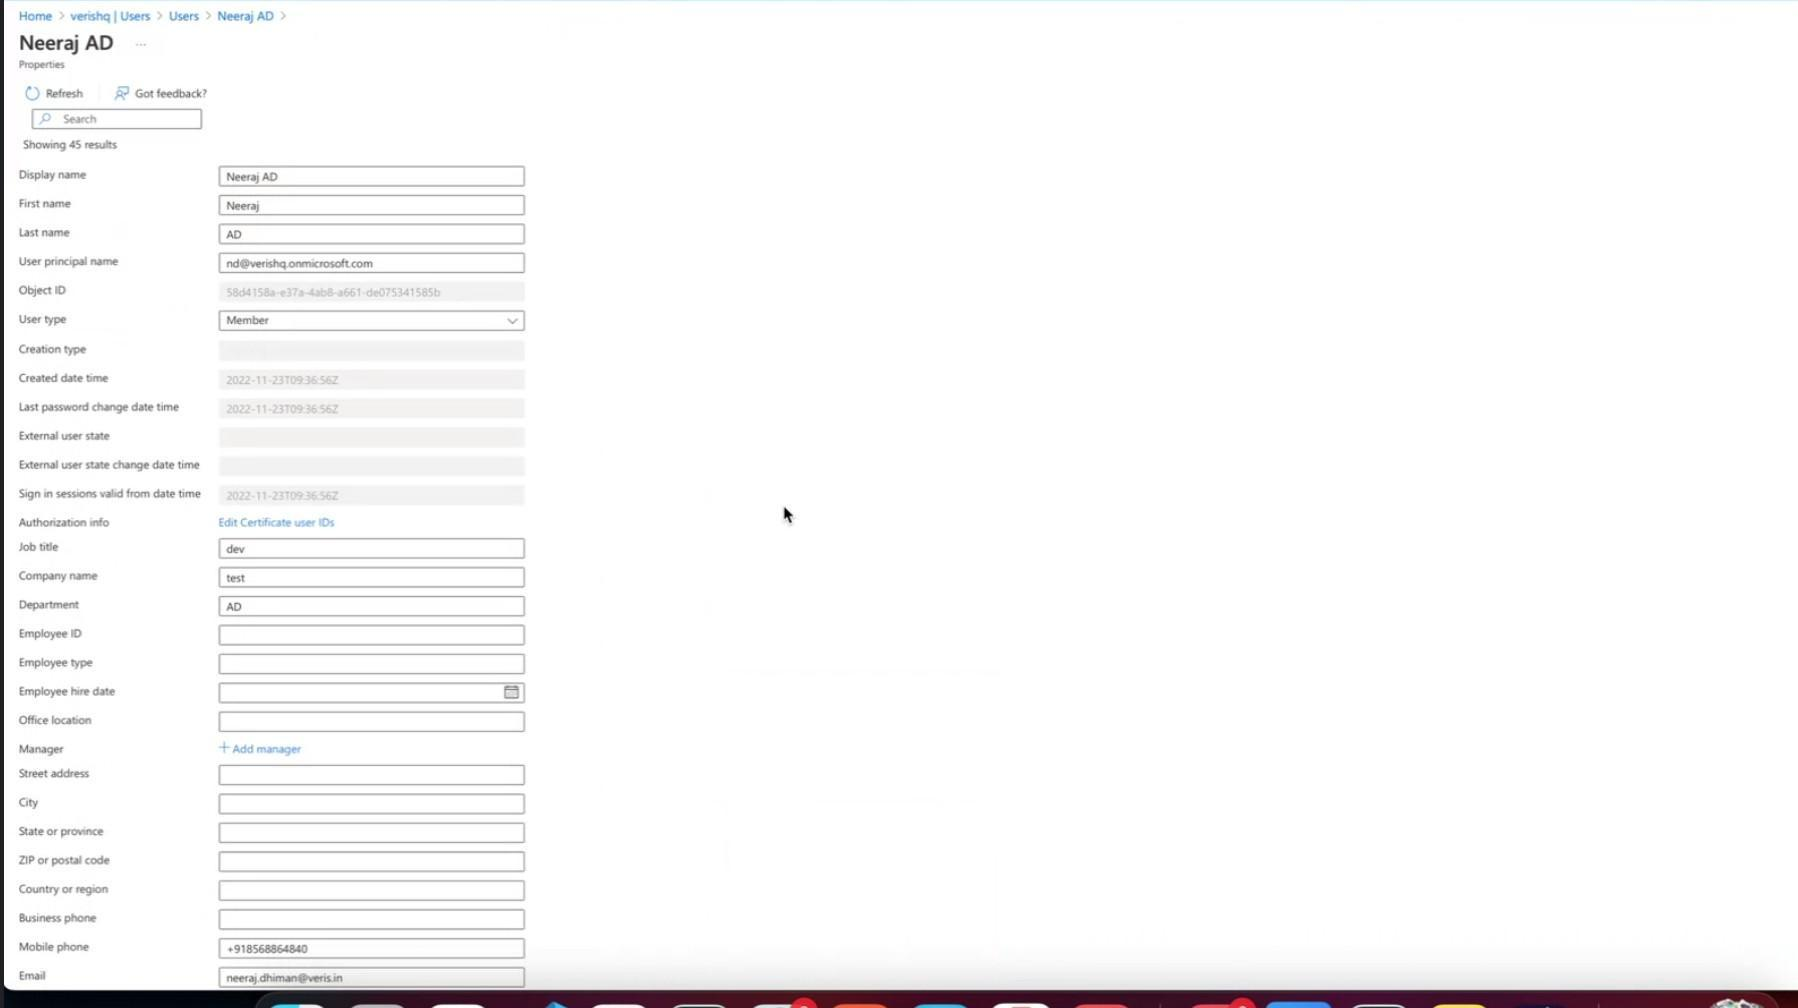
20. The attribute Account Enabled (as shown below) will act as a check if a member will be active or inactive (present in the organization or no longer present in the organization).